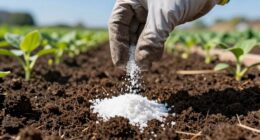
To grow salt crystals, start by making a saturated salt solution with 40g of uniodized salt per 100ml of heated water, stirring until no more dissolves. Choose a stable, cool spot with minimal vibrations and consistent temperature to let the solution cool slowly and evaporate naturally. Use wide, shallow containers and cover loosely to control evaporation. Keep an eye on environmental factors and wait patiently for crystals to form; more tips await if you continue.
Key Takeaways
- Prepare a saturated salt solution by dissolving 40g of uniodized salt in 100ml of heated water, then filter to remove impurities.
- Choose a stable, cool environment with minimal vibrations and consistent temperature between 15-20°C for crystal growth.
- Allow the solution to cool slowly at room temperature, using shallow containers and loosely covering them to promote evaporation.
- Monitor environmental conditions regularly to maintain humidity and temperature stability, preventing disturbances during growth.
- Harvest crystals carefully with appropriate tools, dry thoroughly, and store in airtight containers to preserve quality.
Top picks for "step grow salt"
Open Amazon search results for this keyword.
As an affiliate, we earn on qualifying purchases.
Gathering Materials and Preparing the Salt Solution
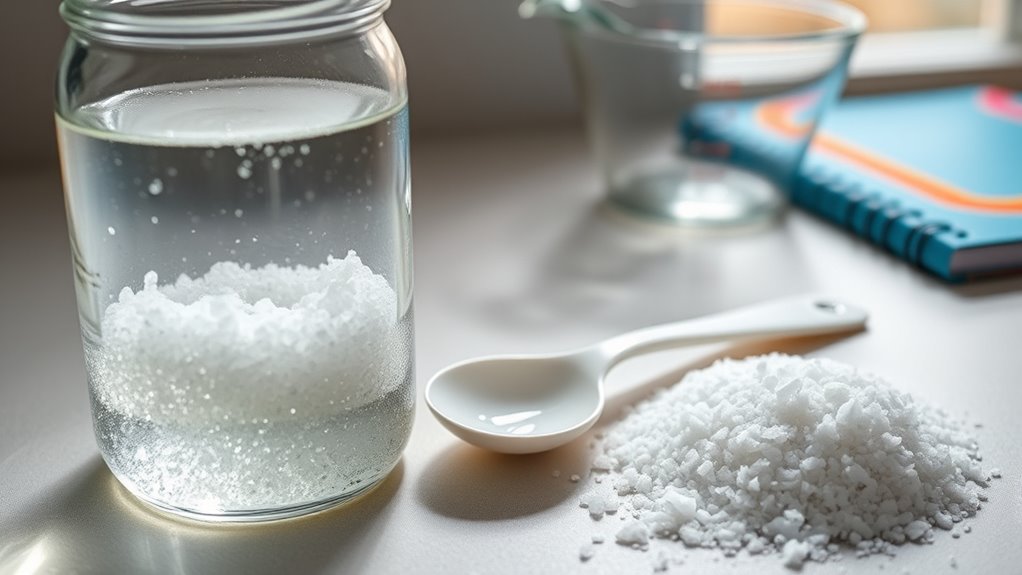
Have you gathered all the materials needed to make a successful salt crystal solution? You’ll need uniodized table salt or additive-free sea salt to avoid impurities. Use a large pot to heat water near boiling, which helps dissolve the salt quickly and evenly. To guarantee a clean solution, get a filter funnel and filter paper or tissue to remove undissolved particles and impurities. Prepare a jar and a flat dish for controlled crystallization, plus small containers for secondary growth phases. Follow the salt-to-water ratio of 40 grams of salt per 100 milliliters of water for maximum saturation without residue. Gradually add salt while stirring until barely any undissolved salt remains. Avoid iodized salt to prevent crystallization inhibitors, and opt for pure alternatives like sea salt for consistent crystal formation. Additionally, utilizing proper exfoliation techniques can help prepare the surface for better crystal growth, ensuring optimal adhesion and uniformity.
Choosing the Right Environment for Crystals to Grow
Selecting the right environment is vital for growing clear, large salt crystals. Aim for a stable, cool location where temperatures stay consistent, ideally between 15-20°C. Cooler environments reduce the growth rate, allowing crystals to form more orderly and grow larger. Avoid areas near heat sources or with temperature fluctuations, as these can cause defects. Maintaining a consistent environment helps prevent crystal imperfections and promotes better growth. Choose a spot with minimal vibrations and disturbances—basements or storerooms are ideal. Keep the environment free from direct sunlight, which can cause uneven heating, and manage light conditions to prevent disturbances. Controlling humidity is also critical; a humid space slows evaporation, promoting stable growth. Additionally, monitoring and maintaining the environmental conditions ensures optimal crystal development. Use containers that minimize evaporation, and ensure the environment remains steady to prevent crystal imperfections and achieve the best results. Creating a stable environment with consistent conditions can significantly improve the quality of your salt crystals.
Initiating Crystallization: Evaporation and Cooling Techniques

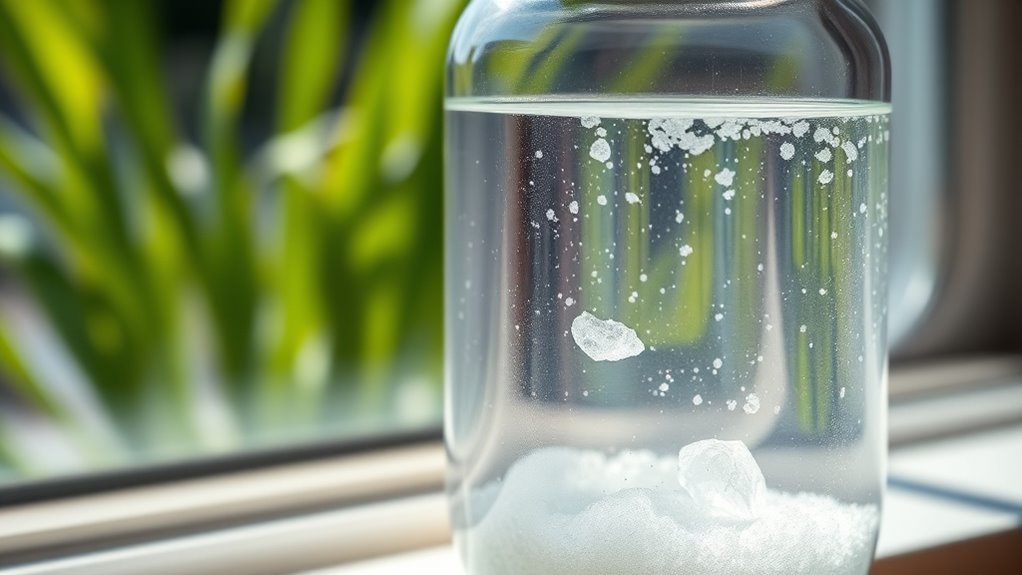
To successfully initiate salt crystallization, controlling evaporation and cooling processes is essential. Start with a saturated solution, prepared by dissolving 40g of salt in 100ml of heated water until no more dissolves and excess salt settles at the bottom. Filter the solution to remove impurities and undissolved particles. Proper consent management ensures that the process adheres to best practices for handling solution preparations.
Then, allow it to cool slowly at room temperature, avoiding drafts. Use shallow, wide containers to maximize evaporation surface area, and loosely cover them to slow evaporation and reduce nucleation.
For larger crystals, opt for slow cooling, maintaining a stable temperature and avoiding vibrations or disturbances. Carefully manage evaporation by letting water gradually leave the solution over days or weeks. Proper control of these processes encourages the formation of clear, well-defined salt crystals.
Monitoring and Maintaining Optimal Growth Conditions

Monitoring and maintaining ideal growth conditions are essential for producing clear, well-formed salt crystals. Keep the temperature stable to prevent imperfections; sudden changes can distort crystal structure. Control humidity levels to avoid unwanted recrystallization or dissolution. Using a clean, non-reactive container is important to prevent contamination and unwanted nucleation sites. Avoid direct sunlight, which causes uneven heating and disrupts growth. Guarantee your solution is nearly saturated—this encourages crystals to form at the bottom of the container. Regularly inspect the environment to prevent contamination and dust, which can create unwanted nucleation sites. Use clean, non-reactive containers and filtered solutions. Maintaining a consistent solution depth and avoiding disturbances that could trigger premature crystallization are key to successful growth. Additionally, monitoring ambient conditions such as temperature and humidity helps ensure optimal crystal formation. Properly managing solution concentration is crucial; aim for supersaturation without overdoing it to promote steady, uniform crystal growth. Incorporating controlled environment conditions can further enhance crystal quality by minimizing external fluctuations.
Harvesting and Preserving Your Salt Crystals
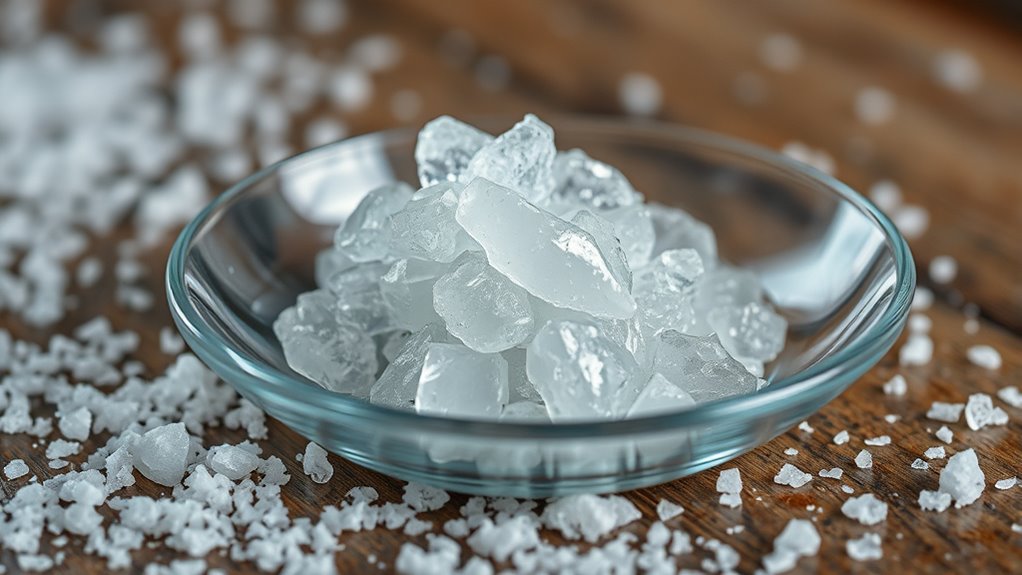
Harvesting and preserving your salt crystals properly guarantees they remain pure, dry, and ready for use. To harvest, use tools like rakes, skimmers, or mechanical scrapers to collect crystals from evaporation ponds, depending on your method. Hand harvesting is ideal for gourmet salts, while mechanical tools suit larger-scale production. Proper storage conditions are essential for maintaining salt quality over time. Once collected, dry the crystals thoroughly to prevent clumping and maintain quality. Washing and grading remove impurities and sort by size, ensuring a clean product. Store your salt in airtight containers in a cool, dry place to preserve flavor and prevent moisture absorption. Consistent updates to your harvesting methods can improve efficiency and salt purity. Proper labeling and certification can verify origin and quality, especially if you plan to sell. Additionally, understanding evaporation process techniques can enhance yield and purity. Following these steps guarantees your salt crystals stay fresh, pure, and ready for culinary or decorative use.
Frequently Asked Questions
Can I Grow Salt Crystals Indoors During Winter?
Yes, you can grow salt crystals indoors during winter. The indoor environment offers stable temperatures, low humidity, and easy access to materials like salt and jars.
You just need to prepare a supersaturated solution, choose a suitable container, and place it in a cool, shaded spot. With patience, you’ll see crystals form within a week.
Keep the environment undisturbed and monitor growth daily for best results.
How Do Impurities Affect the Quality of Salt Crystals?
Impurities considerably impact salt crystal quality by introducing defects, altering morphology, and reducing purity. When impurities compete for adsorption sites, they can cause irregular growth, rough surfaces, and color changes.
They also weaken the crystal structure and increase opacity, making the salt less suitable for food or pharmaceutical applications. Overall, impurities compromise both the aesthetic and functional qualities of salt crystals, leading to inconsistent, lower-quality products.
Is It Possible to Grow Colored Salt Crystals Naturally?
Yes, you can grow colored salt crystals naturally by adding natural pigments like iron oxide, algae, turmeric, or plant extracts into your salt solution.
These natural colorants influence the crystal’s hue without compromising purity if used carefully. You’ll want to regulate environmental factors like temperature and concentration to guarantee consistent coloring.
Experimenting with different natural additives can lead to unique, beautifully colored salt crystals.
What Are Common Mistakes That Cause Crystal Imperfections?
You might see your crystal’s perfect symmetry marred by tiny flaws, caused by common mistakes. When you fail to filter impurities, dust particles settle, acting like tiny sparks that disrupt orderly growth.
Handling crystals roughly or exposing them to vibrations shakes their delicate structure. Poor temperature control or uneven cooling creates uneven layers and cracks.
Even environmental factors like humidity and light can stain or weaken your crystals, ruining their natural beauty.
How Long Does It Typically Take for Crystals to Fully Form?
Crystals usually fully form within 3 to 4 days if you keep ideal conditions. You’ll notice initial formation within 24-48 hours, with cubic structures becoming visible by day 2 or 3.
Larger or more complex crystals may take weeks, but most home setups reach full development in about a week. Keep temperature stable, maintain supersaturation, and control evaporation to guarantee timely, healthy crystal growth.
Conclusion
Now that you’ve mastered the art of salt crystal cultivation, you’re basically a science wizard. Soon, you’ll have shimmering, edible-looking gems to impress friends or just make your kitchen feel more like a sparkling cave. Just remember, patience is key—unlike that last diet, these crystals actually grow! So keep an eye on your setup, resist the urge to snack on them, and enjoy your newfound talent for turning ordinary salt into dazzling decor.