
To grow alum crystals at home, start by dissolving about 90g of alum in 500ml hot water, then filter and cool the solution to create a supersaturated mixture. Suspend a seed crystal in the solution and keep it undisturbed in a stable, cool environment around 24°C. Let it sit for several days until crystals form. If you stay patient and follow proper setup, you’ll discover tips for larger, clearer crystals as you continue.
Key Takeaways
- Dissolve alum in hot water to create a saturated solution, then filter and cool slowly to promote crystal growth.
- Use clean, dry equipment and support a seed crystal on a string or stick to encourage larger crystals.
- Maintain a stable environment around 24°C and avoid vibrations or disturbances during growth.
- Wait patiently for crystals to develop over days or weeks, ensuring the solution remains undisturbed.
- Carefully extract, dry, and store crystals using tweezers, avoiding fingerprints and excess moisture.
Gathering Materials and Preparing Your Alum Solution

To start growing alum crystals, you first need to gather the right materials and prepare your solution carefully. Get about 250 grams of potassium alum, which you can find in grocery stores or online, often in the baking section. You’ll also need hot water, a spoon for stirring, a coffee filter or tissue paper for filtration, and a container to grow your crystals. To prepare the solution, dissolve 90 grams of alum in 500 ml of hot water, stirring until fully dissolved. Then, filter the mixture to remove impurities and let it cool to room temperature. Ensuring the solution is saturated is essential for crystal growth. Use clean, dry equipment to prevent contamination and handle materials safely throughout the process.
Understanding the Role of Temperature in Crystallization
Temperature plays a crucial role in controlling the crystallization process of alum. You’ll find that the best growth occurs near freezing, around 1–4°C, where low water solubility encourages crystal formation. Temperatures below 0°C cause freezing, halting growth altogether. On the other hand, higher temperatures above 4°C reduce solubility, slowing down crystal development. For clear, high-quality crystals, maintaining a steady ~24°C is ideal, as it promotes slow, controlled growth without defects. Temperature also influences solubility: cooling saturated solutions triggers crystallization, while fluctuations disrupt the process. Rapid cooling or extreme temperatures can cause structural defects or dehydration. To grow perfect crystals, you’ll want to monitor and keep the temperature consistent, avoiding sudden changes that could compromise crystal quality. Additionally, understanding the relationship between temperature and solubility helps optimize crystal growth conditions.
Creating a Supersaturated Solution for Crystal Growth

Creating a supersaturated solution involves dissolving more alum in water than it can normally hold at a specific temperature, resulting in a metastable state ready for crystal growth. To do this, heat water until it’s hot but not boiling, then gradually add alum while stirring until no more dissolves. The solution becomes saturated at this temperature and holds the maximum amount of alum dissolved under current conditions. The next step is to carefully cool the solution slowly, which allows more alum to stay dissolved beyond its normal limit. This process creates a supersaturated solution, where the excess alum remains dissolved in a delicate, unstable state. Proper temperature control is crucial to maintaining the supersaturated state and ensuring successful crystal formation. Additionally, understanding the solubility of alum at different temperatures can help optimize the process for larger, more defined crystals. Avoid disturbance or shaking during cooling, as these can trigger premature crystallization. Store the solution in a stable environment, and it will be ready for crystal growth in the next steps.
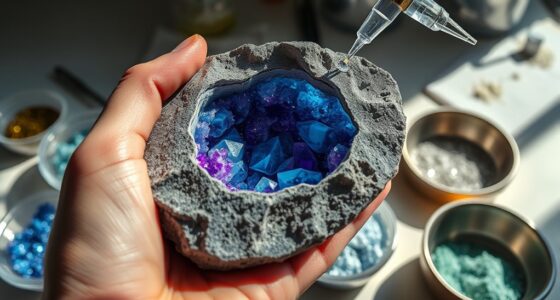
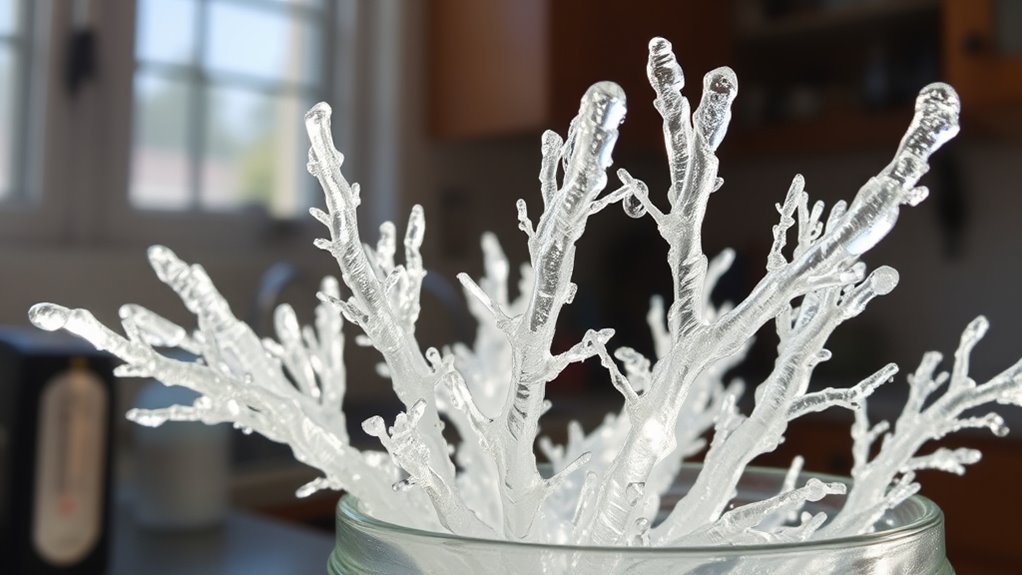
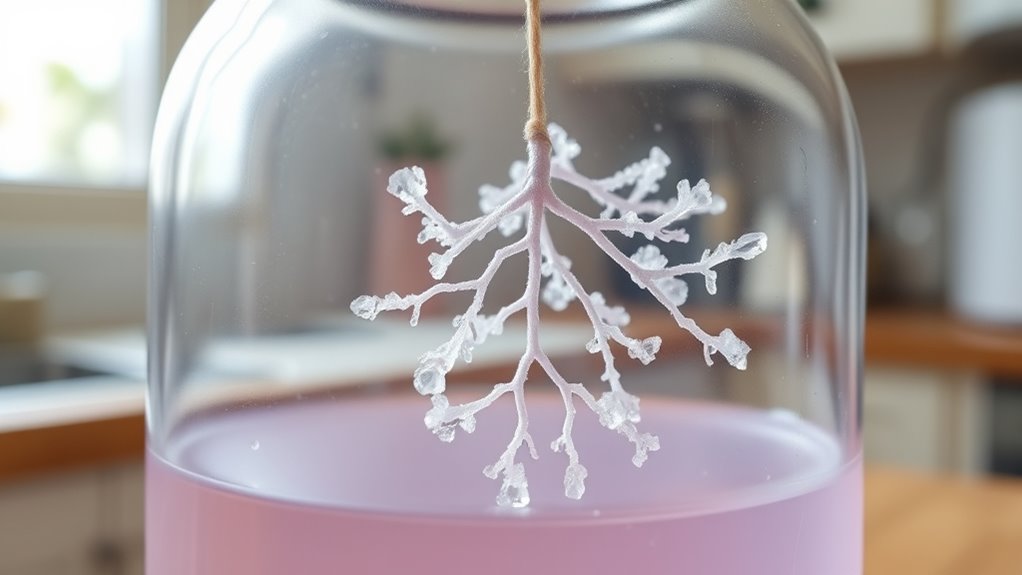
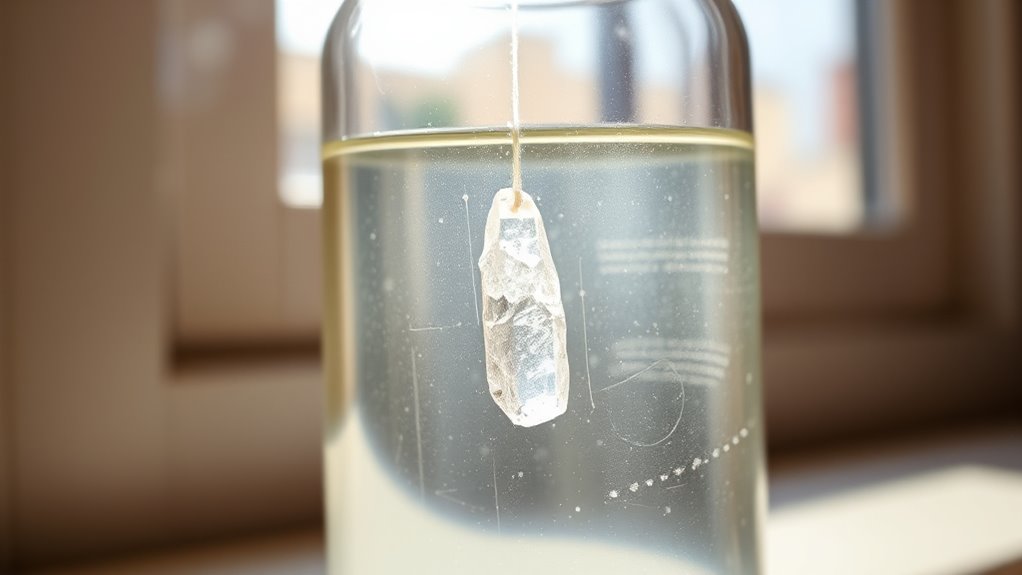
Setting Up a Seed Crystal for Larger Crystals
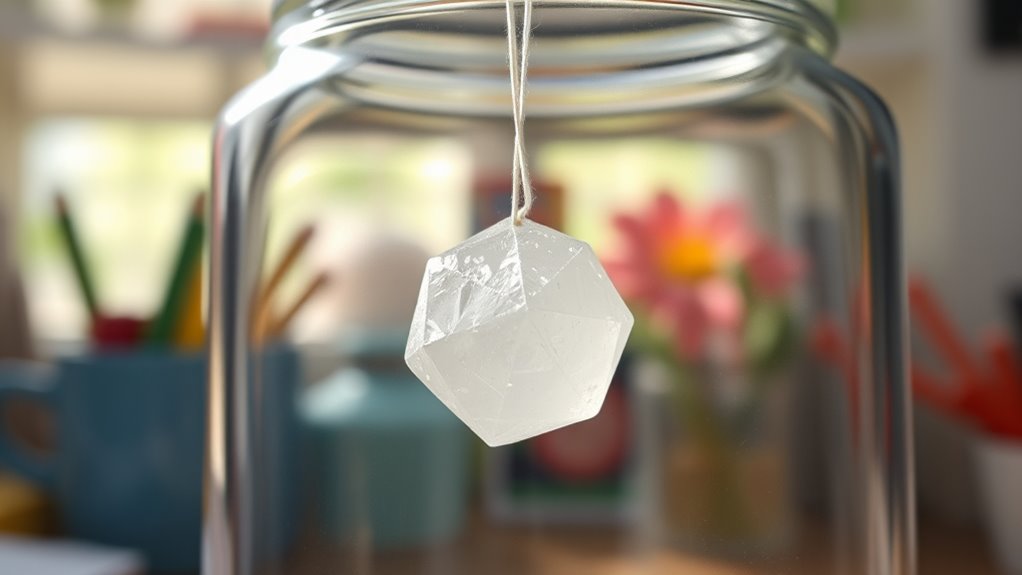
Before you can grow larger alum crystals, you need to prepare a suitable seed crystal environment. Start by carefully selecting a small, clear, well-formed crystal from your cooled solution, inspecting it with a magnifying glass. Handle the seed gently to avoid damage. Attach the seed to a piece of string or fishing line, tying it securely. Use a stick with tape to support the string, ensuring the seed hangs freely in the solution without touching the container sides or bottom. The setup should be stable and undisturbed. Proper setup is essential for successful crystal growth. Choosing a transparent container allows you to observe the growth process clearly and make adjustments if necessary. Place it in a quiet location, away from vibrations or drafts. This setup provides the ideal foundation for your alum crystal to grow larger over time. To ensure successful growth, understanding the crystal formation process can help you optimize conditions for larger crystals. Additionally, maintaining a consistent temperature and avoiding disturbances will further promote crystal growth. Being aware of energy monitoring features can also help you keep the environment stable by managing ambient temperature fluctuations.
Choosing the Best Environment for Crystal Formation
Choosing the right environment is essential for successful crystal formation, as factors like temperature, evaporation rate, and light directly influence crystal growth quality. Keep the temperature steady around 24°C (75°F) to promote consistent growth and prevent imperfections caused by fluctuations. Warmer environments speed up evaporation, yielding smaller or less defined crystals; cooler settings slow evaporation, allowing larger, clearer crystals but increasing the risk of inclusions. Use covered containers to control evaporation, preventing rapid surface crusts, or uncover them for faster growth with caution. Maintain indirect light to enhance visibility without overheating the solution. Avoid drafts and vibrations that disturb crystal formation. Using pure, distilled water and clean containers helps guarantee impurity-free growth, resulting in clearer, more beautiful alum crystals. Incorporating protective styling techniques can help maintain the integrity of your crystals during growth. Additionally, understanding the environmental factors that influence crystal development can help you tailor conditions for optimal results. Properly managing temperature stability is also crucial to achieving high-quality crystals and minimizing defects during growth.
Monitoring and Patience During the Crystallization Process
Monitoring the crystallization process carefully is essential to achieving clear and well-formed alum crystals. In the first 30 minutes, nucleation begins, so avoid disturbing the solution during this time. Use visual checks to observe the growth, but don’t touch the container; vibrations can disrupt crystal development. Patience is key, as larger crystals may take weeks to fully form. Keep the environment stable—maintain temperature at 24°C, control humidity, and prevent evaporation. Regularly inspect for clarity and structural integrity, and ensure the solution remains undisturbed. If needed, gently filter to remove debris that could hinder growth. Remember, rushing or mishandling the solution can cause imperfections, so patience and careful observation are your best tools for successful alum crystal growth. Additionally, understanding how automation technologies are transforming laboratory processes can help optimize your crystallization experiments. Incorporating proper environmental controls can further improve crystal quality by maintaining consistent conditions throughout the process. Being aware of crystal growth factors, such as supersaturation levels and temperature stability, can also contribute to better results. Moreover, consulting reliable sources about laboratory safety ensures safe handling during your experiments.
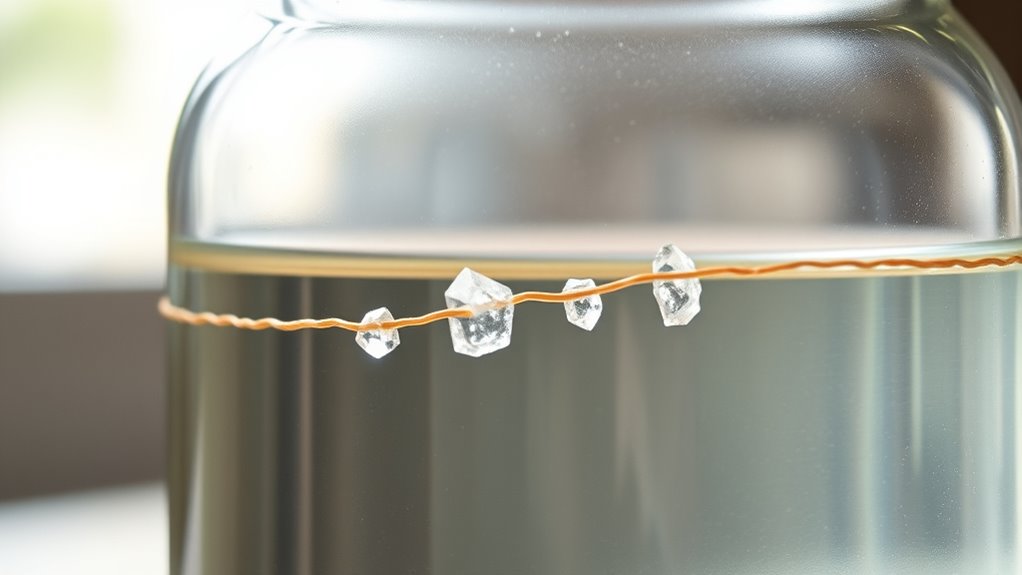
Techniques for Growing Larger and Clearer Crystals
To grow larger and clearer alum crystals, start by developing high-quality seed crystals. Sprinkle alum powder into your cooled, filtered solution to create nucleation sites, and let it sit undisturbed for two days to assure proper growth. Select symmetrical, flat crystals from the dish, avoiding early-stage specimens that may have structural flaws. Suspend your seed crystals using fishing line to minimize contact points and promote uniform growth. Prepare your solution with 40g alum per 100ml water at around 50°C, then filter and transfer it to a clean container. Cool the solution gradually to room temperature before seeding. Maintaining a stable temperature is crucial to prevent uneven growth and defects. Minimize vibrations, and keep the environment free of dust and direct sunlight. Additionally, controlling the environmental conditions during growth can significantly improve crystal quality. Proper control of temperature stability further ensures consistent crystal formation and reduces the risk of cracks or cloudiness.
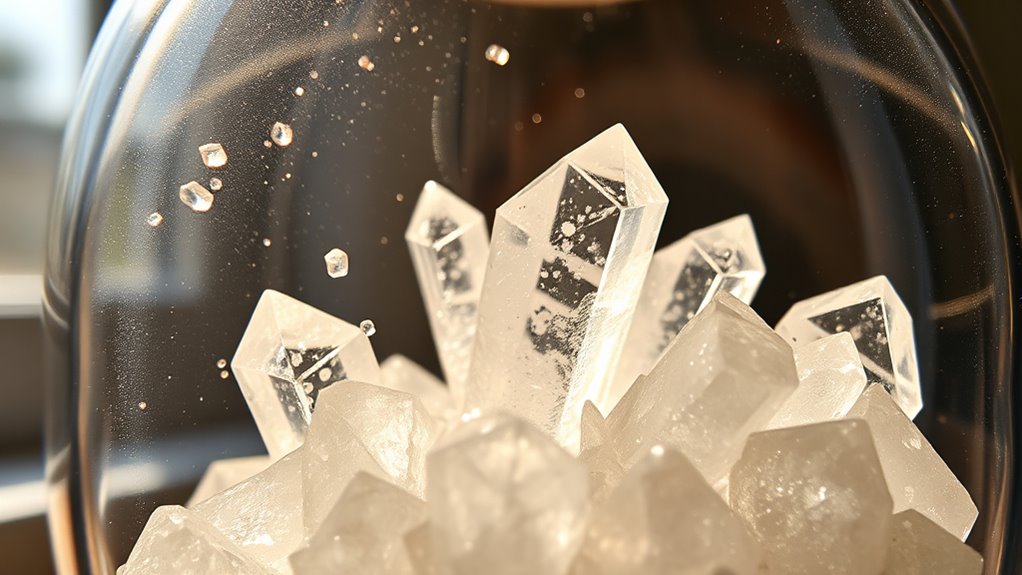
Removing and Drying Your Alum Crystals
Once your alum crystals have fully formed, you’ll need to carefully remove them from the solution to prevent damage. Wait until evaporation slows or stops before extracting. Use tweezers or forceps to gently lift the crystals, avoiding skin contact that could harm their surfaces. To decant leftover solution, pour slowly to keep crystals at the bottom intact. Keep backup seed crystals sealed in plastic bags for future growth. Handle crystals only by their edges or base to prevent fingerprints and oils. Avoid rinsing them with water to prevent dissolving or surface damage. Instead, gently brush off debris with a soft artist’s brush or compressed air. Place the crystals on a non-stick surface, like wax paper, and allow them to air-dry at room temperature for 24-48 hours in low humidity.
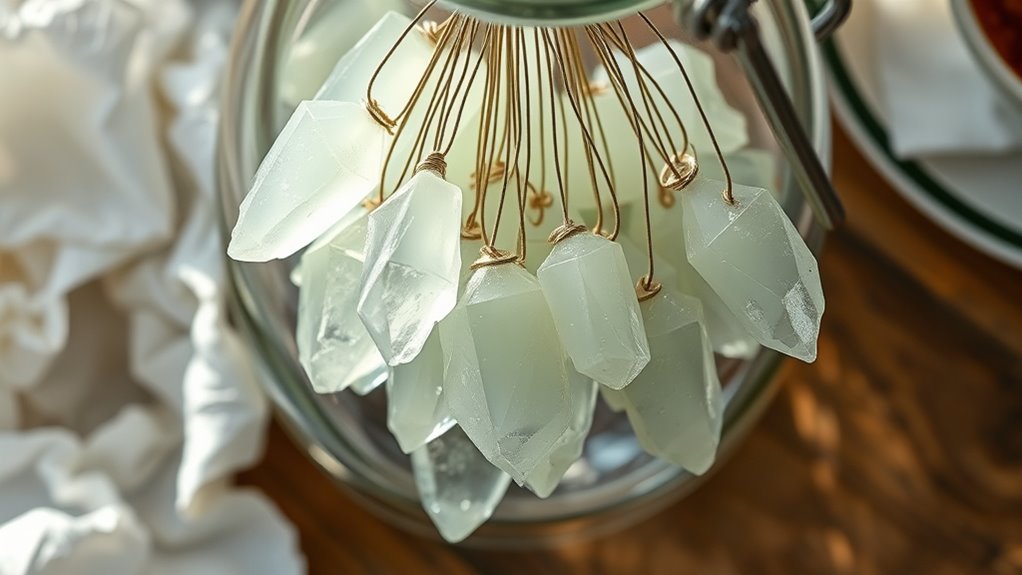
Displaying and Caring for Your Crystal Collection

Displaying your alum crystal collection beautifully requires thoughtful choices to protect and showcase each piece. Use soft, focused lighting to highlight the crystal facets without causing overheating. Keep humidity levels moderate to prevent moisture damage and crystalline erosion. Select clear containers or cabinets to maximize visibility and protection, but avoid direct sunlight, which can discolor or degrade the crystals. Place your display in a stable, secure location to prevent accidents. Regularly dust the crystals with a soft brush or cloth to maintain clarity. Store them in a room with stable temperature conditions, handling carefully with tweezers or gloves to avoid oils. Avoid exposing your crystals to chemicals, and monitor for signs of moisture or dampness, ensuring they stay pristine and beautiful.
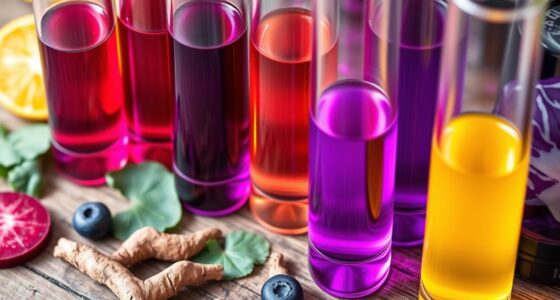
Fun Ways to Use Your Alum Crystals in Creative Projects

Creative projects with alum crystals open up a world of possibilities for adding sparkle and unique texture to your decor and educational displays. You can coat branches, insects, or sculptures in alum solution to create shimmering layered crystals, or suspend wire or string in solution for kinetic crystal mobiles. Grow crystals directly on glass surfaces with super glue and alum for textured vases or candle holders. Use clear alum crystals as prisms to split sunlight into rainbows or embed alum-coated rocks and figurines in dioramas for glittering geological effects. These crystals also make engaging educational tools—demonstrating supersaturation, molecular structures, or crystallization timelines. Whether for holiday ornaments, wedding centerpieces, or functional art like geode replicas and jewelry, alum crystals add striking visual appeal to your creative projects.
Frequently Asked Questions
How Can I Speed up the Crystal Growth Process?
Think of your crystals as seeds waiting to grow into towering trees. To speed up growth, increase the alum-to-water ratio, creating a supersaturated solution that encourages rapid crystal formation. Keep the solution hot to dissolve more alum, then cool it slowly to promote steady growth. Use seed crystals to jumpstart the process, and maintain a stable, vibration-free environment for best results. Regularly reheat and monitor to keep growth on track.
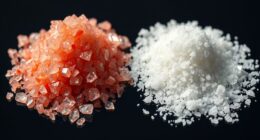
What Causes Crystals to Become Cloudy or Unclear?
Crystals become cloudy or unclear mainly due to impurities or uneven growth. When unwanted particles or minerals are present in your solution, they get trapped in the crystal structure, causing cloudiness. Rapid cooling or uneven evaporation can also lead to irregularities, making crystals less transparent. To keep them clear, use purified water, maintain consistent conditions, and avoid stirring or disturbing the solution during growth.
Can I Grow Crystals on Different Surfaces Besides Strings?
Ever wonder if there’s more to crystal growth than just strings? Yes, you can grow crystals on different surfaces! Using glass, plastic, ceramic, or even metal wires, you’re not limited. Each surface influences crystal shape and size differently. Prepare and clean your chosen material, maybe roughen it for better nucleation, and watch as stunning, unique crystals form. Experimenting with surfaces opens a world of crystal possibilities—dare to explore!
How Do Temperature Fluctuations Affect Crystal Size and Quality?
Temperature fluctuations directly impact crystal size and quality by disrupting the steady growth process. When temperatures fluctuate, supersaturation levels become inconsistent, causing irregular shapes, internal stresses, and smaller, imperfect crystals. Rapid cooling triggers excessive nucleation, leading to many tiny crystals, while stable, controlled temperatures promote larger, clearer crystals with fewer defects. Maintaining consistent heat guarantees better solute deposition and minimizes impurities, resulting in higher-quality alum crystals.
What Are Common Mistakes That Ruin Crystal Growth Attempts?
You might think mistakes are minor, but they can ruin your crystal growth. Common errors include using unfiltered solutions that cause unwanted nucleation, introducing seed crystals too early, or handling them roughly. Also, neglecting temperature stability, exposing setups to vibrations, or using contaminated tools can all lead to poor growth. Keep everything steady, clean, and patient, and you’ll see better, larger crystals develop successfully.
Conclusion
Now that you’ve grown your own stunning alum crystals, you might think you’re a real scientist. But don’t be fooled—crystal growth is more about patience than expertise. With a little heat, a dash of patience, and a bit of luck, you’ve created something nature usually takes ages to craft. So, enjoy your tiny masterpieces — who knew that at home, you could outshine Mother Nature herself?