To do home chromatography with coffee filters, start by drawing colorful circles with water-based markers on a dry, white filter. Fold the filter neatly and set it upright in a water container so the bottom touches the water but the ink doesn’t submerge. Watch as the water moves upward, separating the colors into different pigments. For detailed steps and tips on achieving vibrant results, keep exploring — there’s a lot more to discover!
Key Takeaways
- Use white, unbleached coffee filters to draw centered, saturated water-based ink circles for effective dye separation.
- Fold filters symmetrically to create a pointed tip, aiding water flow and preventing ink smearing during chromatography.
- Submerge the filter’s tip in water, ensuring only the tip contacts water, to allow capillary action and pigment separation.
- Observe color separation as water moves upward, noting different dye travel rates for pigment identification.
- Dry the filter completely after water reaches the top to preserve vibrant, distinct separation results.
Gathering Materials for Your Home Chromatography Experiment
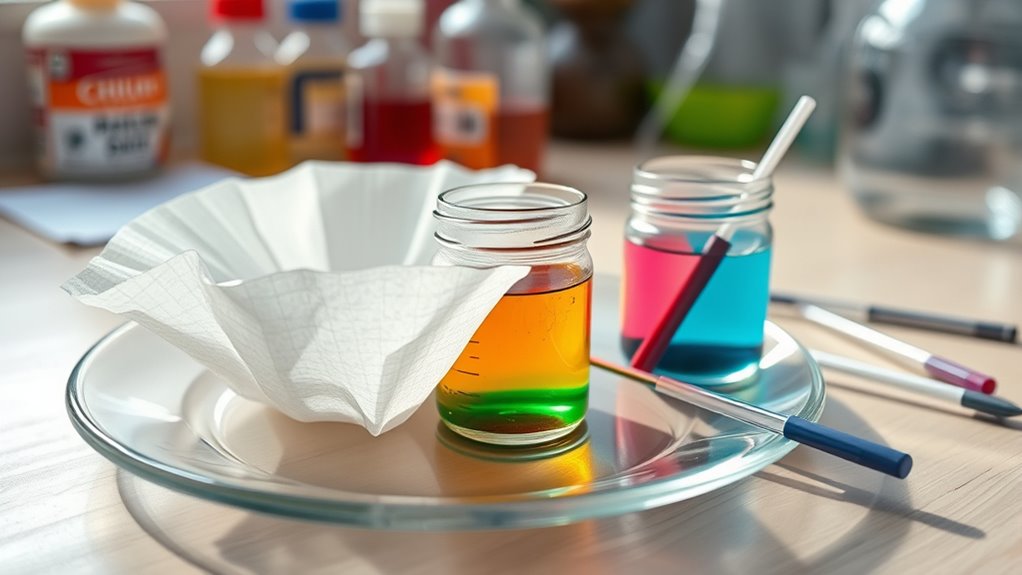
To start your home chromatography experiment, you’ll need to gather some simple materials. First, choose your ink source—washable black markers or non-permanent colored markers work well. Next, pick a filter medium like coffee filters, paper towels, or small cone filters, which are ideal for clear dye separation. You’ll also need small glasses or cups filled with enough water to submerge part of the filter, but not the inked area. Don’t forget miscellaneous supplies—pencils for marking, scissors for cutting filters, and string if needed for hanging. For variety, consider white coffee filters for better visibility or basket-style filters for larger designs. Using accessible, inexpensive materials makes setting up your experiment straightforward and fun, perfect for exploring chromatography right at home. Incorporating workspace organization techniques can also help keep your area tidy and efficient during your experiment. Additionally, understanding the principles of color separation can enhance your interpretation of the results.
Preparing Your Coffee Filter and Drawing the Ink Pattern

Start by selecting a standard white, unbleached coffee filter, which guarantees uniform absorption of ink and clear separation of dyes. Place the filter on a hard, non-porous surface to prevent accidental liquid absorption while drawing. Using washable, water-based markers, draw a circle 1/2″ to 1″ in diameter at the center of the unfolded filter. Apply thick, saturated layers of ink to ensure enough pigment for effective separation. Keep multiple circles at least 2-3″ apart if testing different inks. Maintain medium pressure when drawing to avoid tearing the filter. Let the ink dry for 30-60 seconds before immersion to prevent smearing. Keep the circle at least 1.5″ away from the edges to avoid premature water contact. These steps help guarantee consistent, clean results. Incorporate proper project management practices to stay organized throughout your chromatography experiment. Additionally, understanding chromatography techniques can improve your results and help you interpret the separation patterns more accurately. Being aware of website performance metrics can also assist in tracking your experimental progress and optimizing your technique. Recognizing the influence of digital distractions can help you maintain focus during delicate steps of the process. Recognizing proper drying techniques can further improve the clarity of your results and prevent smudging.
Folding the Coffee Filter for Optimal Results

Folding your coffee filter properly is essential for achieving ideal chromatogram results. A well-folded filter creates a sharp point that makes it easier to insert into your water container while keeping the marker area dry and away from the water. Use precise, symmetrical folds to ensure even capillary action, which promotes uniform water movement up the filter. Crisp, sharp folds help maintain the filter’s structure and influence the flow rate, affecting how colors separate. Folding multiple times can create a pointed tip ideal for placement and prevent premature contact with water. Consistent folding techniques are key for reliable, comparable results. Remember, the goal is to fold enough to keep the marker area dry and to promote even water absorption and color separation throughout your chromatography process. Proper folding also ensures better control over the water flow rate, leading to clearer and more distinct chromatogram results. Additionally, understanding the capillary action involved can help optimize the timing and quality of your separation. Paying attention to folding techniques can further improve your results and make your experiments more consistent.
Setting Up the Water Container and Positioning the Filter

Setting up the water container correctly is essential for a successful chromatography experiment. Make sure the water level touches only the tip of the coffee filter, avoiding submersion of the colored section. Use small cups or containers to hold the water and support the filter. Place the container on a stable surface to prevent spills and disturbances. Tap water works fine, but pure or distilled water minimizes contamination risks. Keep the environment at moderate humidity to prevent interference with capillary action. Suspend the filter so only its tip contacts the water, ensuring the colored part stays dry. Keep the filter vertical and steady, using tape or clips if needed. Once positioned, avoid disturbing the setup to allow proper movement of the solvent and pigments. Automation technologies can help monitor and maintain optimal conditions during the experiment.
Initiating the Chromatography Process and Observing Separation

Once you’ve prepared your coffee filter with markings or ink, you can begin the chromatography process by carefully placing it into the water container. Make sure the bottom edge of the filter touches the water but doesn’t submerge the inked area. As the water moves up through capillary action, you’ll see the colors start to separate and spread out. Observe how different colors travel at varying rates—brighter colors often move faster, while darker or resistant shades stay closer to the original line. Keep an eye on the process until the water nears the top or reaches the edge of the filter. Patience is key; wait for the filter to dry completely before analyzing the results. This step reveals how ink components separate based on their solubility and affinity to the filter material, which is a fundamental principle of chromatography. Understanding the tuning modifications in vehicles can also help optimize performance, much like how different ink components respond uniquely during separation. Additionally, ensuring proper air quality during the process can help achieve clearer results. Recognizing the importance of celebrity lifestyle insights can also make scientific experiments more engaging and relatable for learners.
Understanding the Roles of Components in the Experiment

Understanding the roles of the various components in your chromatography experiment helps you see how the process works. Your coffee filter acts as the stationary phase, thanks to its small fibers that absorb the solvent and provide a large surface for separation. The solvent, usually water, moves through the filter, carrying different pigments at varying speeds based on their solubility. Washable markers are essential because their water-soluble pigments dissolve and separate during the process. The pigments travel upward, creating distinct color bands that reveal their composition. The uniform structure of the coffee filter ensures consistent results, while the solvent’s properties—like polarity—affect how well components separate. Recognizing these roles helps you understand how molecules interact and separate during chromatography. Additionally, the use of Hyaluronic Acid in skincare can enhance hydration and support the effectiveness of products like eye patches. Moreover, understanding material properties such as porosity and absorption rates can improve the accuracy and reliability of your chromatography results.
Furthermore, understanding the Personality Traits involved in relationships can help you better interpret how individuals behave during tests or experiments, such as those involving communication styles or conflict resolution. Insights into molecular interactions can also deepen your comprehension of the separation process, leading to more precise experimental outcomes.
Exploring Variations and Creative Applications of Coffee Filter Chromatography

Exploring variations and creative applications of coffee filter chromatography opens up many fun and educational possibilities beyond traditional experiments. You can use different colored markers to see how pigments separate, revealing vibrant and unexpected color combinations. Incorporate natural elements like leaves to observe how their pigments separate, connecting science with nature. Black markers can uncover hidden hues, adding an element of surprise. The colorful dyes from chromatography can be transformed into floral crafts or decorative flowers, blending art with science. You might experiment with different solvents like rubbing alcohol to see how they influence pigment separation or try alternative materials to paper for unique results. Mixing marker colors before applying them can produce new, intriguing patterns, making chromatography an inventive and versatile activity. Additionally, understanding the importance of payment security can help safeguard your creative projects when sharing or selling your artwork online.
Tips for Achieving Clear and Vibrant Results

To achieve clear and vibrant chromatography results, selecting the right materials is essential. Use washable markers, as they produce more distinct color separations, unlike permanent markers. Choose round, white coffee filters because their absorbency and transparency help display colors clearly. Water works well as a solvent, moving pigments up the filter effectively. Mark the starting line with a pencil to track pigment movement precisely. Cut filters into rectangles for better control and consistency. Secure strips to pencils or sticks to prevent submersion, and label each strip to identify marker colors. Guarantee the water level touches only the bottom of the strip, and let the solvent travel fully before removing. Dry the strips thoroughly to enhance color contrast, and consider lighting conditions or backgrounds to make separated colors more vivid.
Analyzing and Displaying Your Chromatography Artwork

Once you’ve completed your chromatography experiment and allowed the strips to dry, it’s time to analyze and showcase your results. Start by recording the solvent type and concentration ratios you used, along with the pigment sources, to understand your separation. Measure the distance each pigment traveled to calculate Rf values, then compare them to reference standards for identification. Use UV light to reveal fluorescent compounds invisible under normal light. Digitize your results by scanning the strips for accurate measurement and archiving. To display your artwork, laminate the strips to preserve the patterns, backlight them with LED panels for better contrast, or mount them on acid-free paper. Consider shadow boxes for layered compositions and include diagrams explaining the chemistry behind the separation.
Frequently Asked Questions
How Long Does It Take for the Colors to Fully Separate?
You want to know how long it takes for colors to fully separate in chromatography. It usually takes anywhere from a few minutes to about thirty minutes, depending on factors like filter size, water level, and environmental conditions. Keep an eye on the filter as water rises, and you’ll see the colors start to split apart. Patience is key, but the process is quick enough to observe within a short period.
Can Different Types of Ink Produce Better Separation Results?
Ever wonder if your ink choices can open better separation? You discover that washable markers with water-soluble pigments often give clearer results, revealing vibrant bands. Premium inks might hide hidden colors, offering even more contrast. Using the right ink type and quality makes a big difference. So, yes, switching inks can produce surprisingly better separation results, turning your simple experiment into a colorful discovery.
Is It Safe to Use Permanent Markers for Chromatography?
You’re asking if it’s safe to use permanent markers for chromatography. Generally, it’s considered low-risk for brief, incidental use, as inks contain alcohol-based solvents and pigments that pose limited health hazards. Just guarantee good ventilation, avoid prolonged contact, and store markers safely away from children and pets. Use personal protective equipment if necessary, and follow disposal guidelines to prevent environmental contamination. Always check the manufacturer’s SDS for specific safety info.
How Can I Prevent the Ink From Dissolving in Water?
Did you know that pigment-based inks are 30% less soluble in water than dye-based inks? To prevent ink from dissolving, choose inks with pigments instead of dyes, as they’re less water-soluble. You can also minimize contact time by quickly moving the paper through the solvent, or use thicker papers that slow water absorption. These steps help keep the ink intact during chromatography, ensuring clearer separation results.
What Should I Do if the Colors Do Not Separate Properly?
If the colors don’t separate properly, first check your filter paper quality—using specialized chromatography paper helps. Make sure you’re using the right solvent; water alone might not be enough for some pigments. Adjust the solvent’s strength by adding a small amount of ethanol or glycerol. confirm your setup is stable and the solvent front moves evenly. Improving these factors will help you achieve better separation of the colors.
Conclusion
Now that you’ve tried home chromatography with coffee filters, you’ll see how simple tools reveal hidden colors and patterns. Did you know that even a basic coffee filter can separate over 10 different pigments? With a little practice, you can create vibrant artwork and learn about the science behind color. Keep experimenting, and you’ll uncover fascinating details about everyday materials — all from the comfort of your home!