
To grow lead iodide crystals at home, start by carefully dissolving lead nitrate in warm water and then gradually add potassium iodide solution to trigger a reaction. As the insoluble lead iodide forms, it precipitates out, creating bright yellow crystals. Take your time with stirring and observation, and gently collect the crystals once they form. If you keep exploring, you’ll discover detailed steps on optimizing crystal size and quality.
Key Takeaways
- Prepare separate saturated solutions of lead nitrate and potassium iodide with accurate measurements in a clean workspace.
- Slowly add potassium iodide solution to lead nitrate while stirring to induce lead iodide precipitation.
- Monitor the reaction for the appearance of bright yellow crystals indicating successful crystal formation.
- Gently collect and rinse the lead iodide crystals, then store them in a dry, labeled container for preservation.
- Maintain proper safety procedures, including protective gear and proper waste disposal, throughout the process.
Gathering Materials and Preparing Your Workspace
Before beginning your experiment, gather all the necessary materials, including lead nitrate, potassium iodide, distilled water, and clean glassware. Setting up your lab properly guarantees a smooth process and accurate results. Arrange your glassware—beakers, test tubes, and stirring rods—in a clean workspace. Verify that all containers are spotless to prevent contamination that could interfere with the chemical reaction. Make sure you have measuring tools for precise solution preparation. Safety equipment like gloves and goggles is essential. Your lab setup should provide a clear, organized area for mixing solutions and observing the chemical reaction that leads to lead iodide formation. Proper preparation minimizes errors and keeps your experiment safe, allowing you to focus on the process of growing crystals. Understanding precipitation reactions can also symbolize the importance of careful planning and timing in successful experiment execution. Additionally, maintaining a clean workspace helps prevent unintended contamination that could affect your results.
Understanding the Chemistry Behind Lead Iodide Formation

Understanding the chemistry behind lead iodide formation requires knowing how lead nitrate and potassium iodide react in solution. When these compounds are mixed, they undergo a process driven by chemical equilibrium, where ions from each compound interact. Ionic bonding occurs as lead (Pb²⁺) and iodide (I⁻) ions come together, forming insoluble lead iodide (PbI₂). As the ions combine, the solution becomes saturated, and excess lead or iodide ions remain in solution. The balance of these ions determines when lead iodide precipitates out. Recognizing this equilibrium helps you control crystal growth by adjusting concentrations and conditions. This understanding allows you to predict when and how lead iodide will form, ensuring successful crystal development in your experiments.
Safety Precautions and Handling Chemicals Properly
Handling chemicals safely is essential when working with lead nitrate and potassium iodide to prevent accidents and health hazards. Always wear personal protective equipment, including gloves, goggles, and a lab apron, to shield your skin and eyes from splashes. Work in a well-ventilated area to avoid inhaling fumes. Store chemicals properly in labeled, airtight containers, separate from incompatible substances. Keep lead nitrate and potassium iodide away from children and pets. When mixing solutions, do so carefully to prevent spills or splashes. After completing the experiment, clean your workspace thoroughly and dispose of chemicals following local regulations. Proper handling and storage minimize risks, ensuring a safe environment for everyone involved. Hydrotherapy techniques can also be beneficial if you experience discomfort during the process. Always consult safety data sheets for specific chemical properties to understand potential hazards better. Familiarize yourself with Chemical Storage Guidelines to maintain a safe laboratory environment. Prioritize safety to enjoy your crystal-growing project responsibly.
Dissolving Lead Nitrate in Water

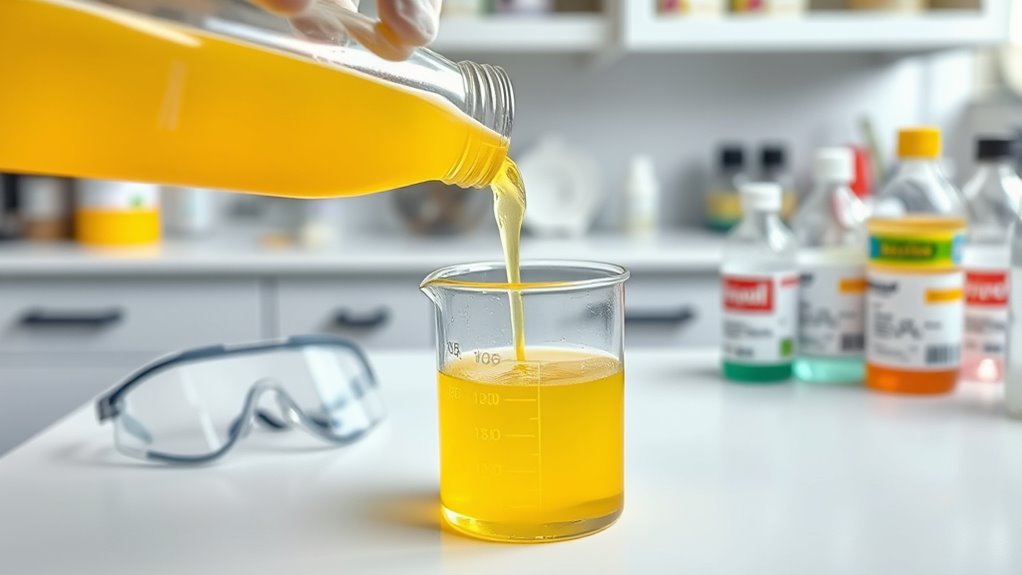
Dissolving lead nitrate in water is a straightforward process that requires careful attention to concentration and temperature. Lead nitrate is highly water soluble, meaning it dissolves easily when mixed with water. To dissolve it effectively, add the lead nitrate gradually to warm water, stirring continuously. The water’s temperature influences the solubility; warmer water allows more lead nitrate to dissolve quickly. Keep in mind that water solubility varies with temperature, so heating the water slightly can help you achieve a clear, saturated solution faster. Be sure to measure the amount of lead nitrate accurately, and avoid adding too much at once to prevent oversaturation. Proper dissolution ensures a uniform solution, which is essential for successful precipitation reactions later. Understanding material properties plays a crucial role in optimizing the efficiency of the process. Additionally, understanding retirement planning principles can help when considering investment options for future educational or scientific pursuits. Knowing how to control solution conditions can further improve the consistency and quality of your precipitation reactions.
Adding Potassium Iodide to Induce Precipitation

When you add potassium iodide, the iodide ions quickly react with lead ions to form lead iodide crystals. This process involves the formation of a solid precipitate from the solution, which you can observe as it appears. Proper handling is essential to ensure safety during this experiment. Additionally, understanding the chemical reactions involved can help you better interpret the results and anticipate the crystals’ growth. Monitoring the reaction conditions can also influence the size and quality of the crystals formed.
Iodide Ion Role
Have you ever wondered how adding potassium iodide can trigger the formation of lead iodide crystals? When you add potassium iodide to your solution, it releases iodide ions into the mixture. These iodide ions are essential because they participate in chemical bonding with lead ions, forming lead iodide. The strong attraction between the lead cations and iodide anions leads to the creation of an insoluble compound that precipitates out of the solution. The iodide ion’s role is indispensable because it acts as the key reactant that binds with lead ions, initiating the formation of crystalline lead iodide. Without enough iodide ions, the chemical bonding necessary for crystal formation wouldn’t occur, making the addition of potassium iodide a critical step in this precipitation reaction. Chemical bonding is fundamental to understanding how these crystals form through ionic interactions.
Precipitate Formation Process
Adding potassium iodide to your solution introduces iodide ions, which immediately start interacting with the dissolved lead ions. This triggers precipitate nucleation, where small clusters of lead iodide form. As more ions join these clusters, crystals begin to grow, adopting a specific crystal lattice structure that stabilizes the solid phase. The process involves rapid nucleation followed by crystal growth, resulting in visible lead iodide precipitates. Understanding nucleation is crucial for controlling the size and quality of the crystals formed. The table below summarizes key steps:
| Step | Description | Result |
|---|---|---|
| Iodide addition | Iodide ions interact with lead ions | Nucleation sites form |
| Nucleation | Clusters of lead iodide emerge | Precipitate begins |
| Crystal growth | Ions attach to nuclei, expanding crystals | Larger crystals develop |
| Lattice formation | Crystals organize into a stable lattice | Crystalline solid |
| Precipitate stabilization | Crystals settle out of solution | Visible precipitate |
Adding potassium iodide also influences the crystal lattice structure, promoting the formation of well-defined crystals. This process is driven by the nucleation process, which is fundamental in forming uniform precipitates.
Safety and Handling
Handling potassium iodide safely is essential to prevent accidents and health hazards. Always wear appropriate personal protective equipment, including gloves and safety goggles, when handling this chemical. Ensure good ventilation in your workspace to avoid inhaling any dust or fumes. Follow chemical safety guidelines by carefully measuring and adding potassium iodide to your solution to prevent spills or splashes. Store the chemical in a labeled, airtight container away from children and incompatible substances. Wash your hands thoroughly after handling, and clean any spills immediately with water. Proper safety precautions, including understanding the contrast ratio, help minimize risks during precipitation reactions, making your experiment both safer and more effective. Additionally, understanding vibrational energy can assist in creating a more harmonious environment for your crystallization process. Recognizing the hydrocolloid material in acne patches highlights the importance of choosing suitable materials for skin healing. Remember, proper safety measures help ensure a successful and hazard-free crystallization process.
Observing and Collecting the Lead Iodide Crystals

You’ll want to watch for clear signs of crystal formation, like the appearance of tiny, solid particles in the solution. Use your eyes carefully to distinguish these from other residues or impurities. Once you spot the crystals, collect them gently and store them in a dry container for further analysis. Additionally, ensuring proper crystal growth conditions can improve the quality and size of the lead iodide crystals you collect.
Crystal Formation Indicators
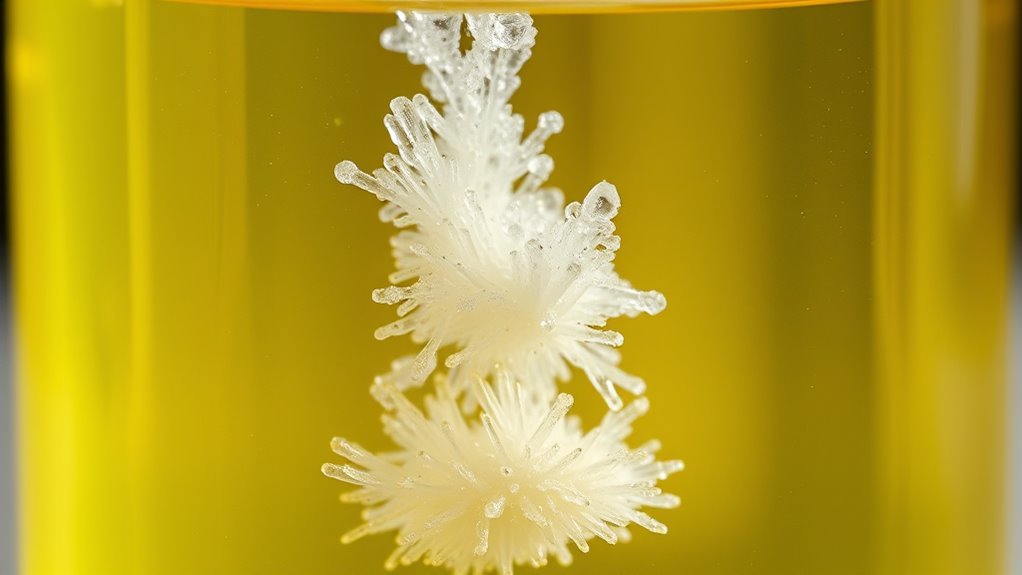
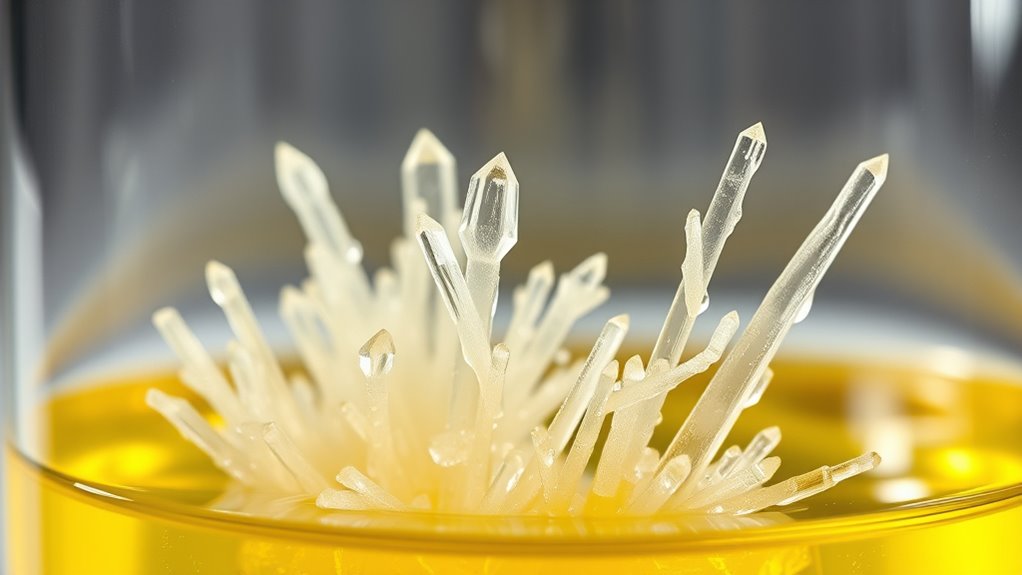
As the precipitation reaction progresses, clear indicators signal the formation of lead iodide crystals. You’ll notice a distinct color change from clear or cloudy solution to a bright yellow, which signals crystal formation. Observe the solution closely; as crystals develop, they often display characteristic crystal symmetry, forming hexagonal or rhombohedral shapes. These geometric patterns are a hallmark of lead iodide’s crystalline structure. The appearance of a yellow hue combined with well-defined, symmetrical shapes confirms that crystals are forming successfully. You might also notice the crystals settling or floating within the solution, making them easier to collect. Recognizing these indicators assure you can stop the reaction at the right moment to harvest pure, well-formed lead iodide crystals. Additionally, understanding the crystal growth process can help optimize the conditions for better crystal quality and size. Monitoring for growth patterns can further ensure the development of desired crystal shapes and sizes. Being aware of precipitation reactions in general can help you better control the crystallization process for improved outcomes.
Visual Inspection Techniques
Once the lead iodide crystals start to form, observing their development becomes straightforward with proper visual inspection techniques. You should compare the color of the crystals to verify they match the expected bright yellow hue. Crystal clarity is also essential; clear, well-defined crystals indicate good growth, while cloudy or irregular ones suggest issues. Use the table below to guide your inspection:
| Aspect | What to Look For |
|---|---|
| Color Comparison | Bright yellow, consistent shade |
| Crystal Clarity | Transparent, sharp edges |
| Growth Rate | Steady, even development |
| Crystal Shape | Well-formed, geometric patterns |
Regularly inspect your crystals to monitor quality and growth progress, guaranteeing the final product meets your expectations.
Collecting and Storing
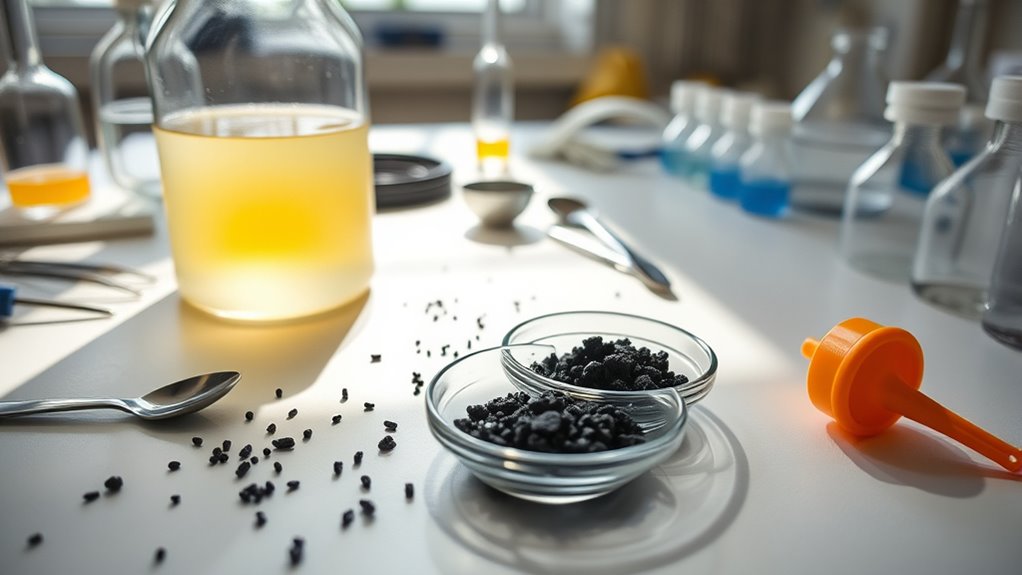
After the crystals have fully formed and reached the desired size, carefully collect them using a spatula or forceps to prevent damage. Handle the crystals gently to preserve their structure and avoid contamination. Once collected, rinse them lightly with distilled water to remove residual impurities. Store the crystals in a dry, airtight container to prevent deterioration. Historically, lead iodide has been used in photographic applications, but modern concerns highlight its environmental impacts, especially if mishandled or improperly disposed of. Proper storage minimizes ecological risks by preventing leaching into soil or water sources. Always label your container clearly and keep it away from children and pets. Taking these precautions ensures safe handling and preserves your crystals for future observation or experimentation.
Enhancing Crystal Growth and Maintenance Tips
To achieve high-quality lead iodide crystals, you should carefully control the conditions during growth. Maintaining a consistent temperature helps promote uniform, well-formed crystals and reduces the formation of alternative crystal shapes that can weaken their structure. Use clean, filtered solutions to minimize impurities, as contaminants can affect purity and lead to irregular growth patterns. Gentle stirring or slow evaporation encourages smooth, balanced crystal development without disrupting the process. Cover your container to prevent dust or airborne particles from settling on the growing crystals. Keep the environment stable and avoid sudden temperature changes. Regularly check your setup, ensuring the solution remains saturated without over-concentrating, which can cause unwanted nucleation. These tips help produce clearer, larger, and more uniform lead iodide crystals.
Cleaning Up and Proper Disposal of Chemicals
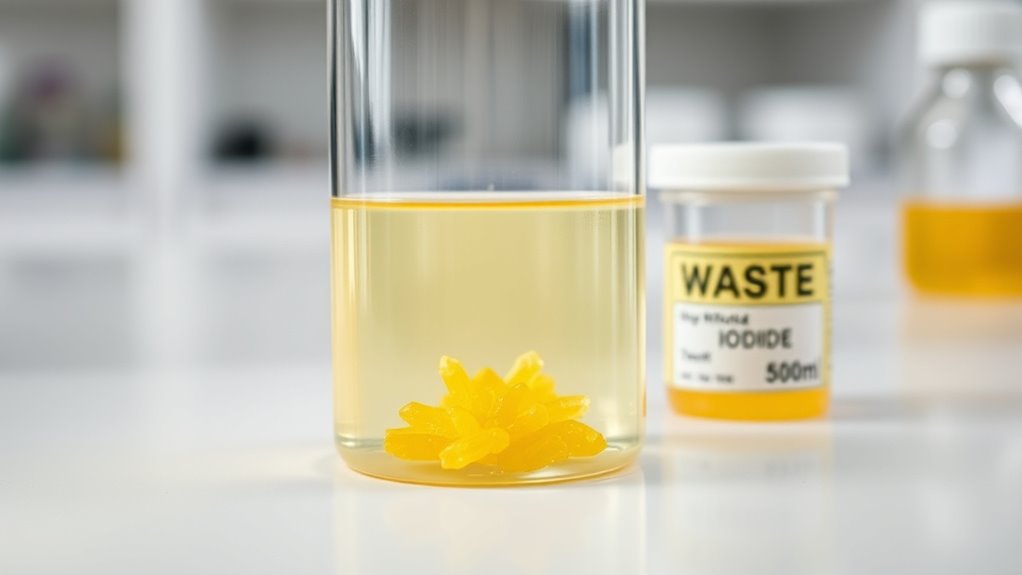
Proper cleanup and disposal of chemicals are essential steps to guarantee safety and environmental protection after growing lead iodide crystals. You must handle chemical waste carefully, ensuring it doesn’t contaminate water or soil. Use appropriate disposal methods, such as collecting leftover solutions in labeled containers for hazardous waste disposal. Never pour chemicals down the drain unless explicitly safe to do so. Proper disposal minimizes environmental risks and keeps your workspace safe. Here’s a quick guide to disposal methods:
| Waste Type | Disposal Method |
|---|---|
| Lead iodide solution | Seal in labeled container, contact local waste facility |
| Contaminated tools | Rinse with water, then dispose or store safely |
| Excess chemicals | Store securely or deliver to hazardous waste center |
Always follow local regulations for chemical waste disposal.
Frequently Asked Questions
Can I Grow Lead Iodide Crystals Without Using Hazardous Chemicals?
You can try growing lead iodide crystals using eco-friendly alternatives or chemical substitutions, but it’s challenging because lead iodide typically requires hazardous chemicals. To minimize risks, look for safer reagents or natural sources of iodine and lead compounds. Always prioritize safety and research eco-friendly options thoroughly. While completely avoiding hazardous chemicals might be tough, using environmentally conscious substitutes can help reduce potential dangers during your crystal-growing process.
How Can I Modify Crystal Size and Shape During Growth?
To modify crystal size and shape, you should control factors like the crystal morphology and growth rate. Slower growth rates typically produce larger, well-formed crystals, while faster rates create smaller, less defined ones. You can adjust temperature, concentration, or stirring to influence these aspects. Additionally, using seed crystals or changing the solution’s pH can help shape the crystal morphology, giving you more control over the final appearance.
What Are Common Mistakes That Affect Crystal Quality?
Oh, the joy of perfect crystals—until impurities contamination and temperature fluctuations show up! These common mistakes sabotage your crystal quality, causing cloudy, misshapen, or weak structures. You might ignore cleanliness or let temperature swing wildly, and suddenly your efforts turn into a science experiment gone wrong. To succeed, keep everything pure, stable, and controlled. Otherwise, your beautiful crystals might just become a lesson in what not to do.
Are There Alternative Household Materials for Lead Nitrate or Potassium Iodide?
You might wonder about household alternatives or DIY substitutes for lead nitrate and potassium iodide. Keep in mind, these chemicals are hazardous, and safe, effective household options are limited. Instead, consider safer, non-toxic materials like food-grade iodine or other soluble salts. However, remember that DIY substitutes may not produce the same quality crystals, and safety always comes first. Always prioritize proper handling and research before attempting such experiments at home.
How Can I Store Lead Iodide Crystals Safely for Future Use?
Imagine holding your carefully grown lead iodide crystals, wondering how to keep them pristine. To guarantee safe storage, place your crystals in an airtight, labeled container away from moisture and direct sunlight. Use gloves and avoid contamination by handling them with care. Proper storage prevents degradation and keeps your crystals pure for future experiments. Stay vigilant—safety and contamination prevention are key to preserving your hard-earned crystals.
Conclusion
By following these simple steps, you’ll witness the magic of chemistry unfold right before your eyes. Remember, each crystal’s delicate formation mirrors your patience and curiosity—reminding you that science is not just about reactions, but about discovery. As you grow your lead iodide crystals, cherish the process. Like nature’s own masterpieces, they remind us that beauty often comes from the most unexpected reactions, waiting to be uncovered by those willing to explore.