
To do simple electroplating experiments, gather a basic setup with a power supply, electrodes, and a safe container. Choose a metal like copper or silver and prepare an electrolyte solution, such as copper sulfate. Submerge your objects and apply low voltage, around 3-6V, for about 15-30 minutes. Keep safety in mind and monitor the process. Keep exploring, and you’ll discover more tips to enhance your electroplating results.
Key Takeaways
- Use a basic setup with a DC power supply, electrolyte solution, and two electrodes for straightforward plating experiments.
- Prepare a simple electrolyte, like copper sulfate, and clean electrodes thoroughly before starting.
- Maintain proper electrode spacing (15-30 cm) and voltage (3-6V) to achieve even metal deposition.
- Submerge electrodes completely and control plating time, typically around 15-30 minutes, for desired thickness.
- Wear safety gear and work in a ventilated area to handle toxic vapors and ensure safe electroplating procedures.

Mini Plater 24K Gold Plating Kit, Gold Plating Machine
- Complete Gold Plating Kit: Includes all necessary components for 24K gold plating
- Continuous Operation: Suitable for high-volume, consistent plating tasks
- Sleek Black Finish: Professional design that complements any workspace
As an affiliate, we earn on qualifying purchases.
As an affiliate, we earn on qualifying purchases.
Setting Up Your First Electroplating Kit
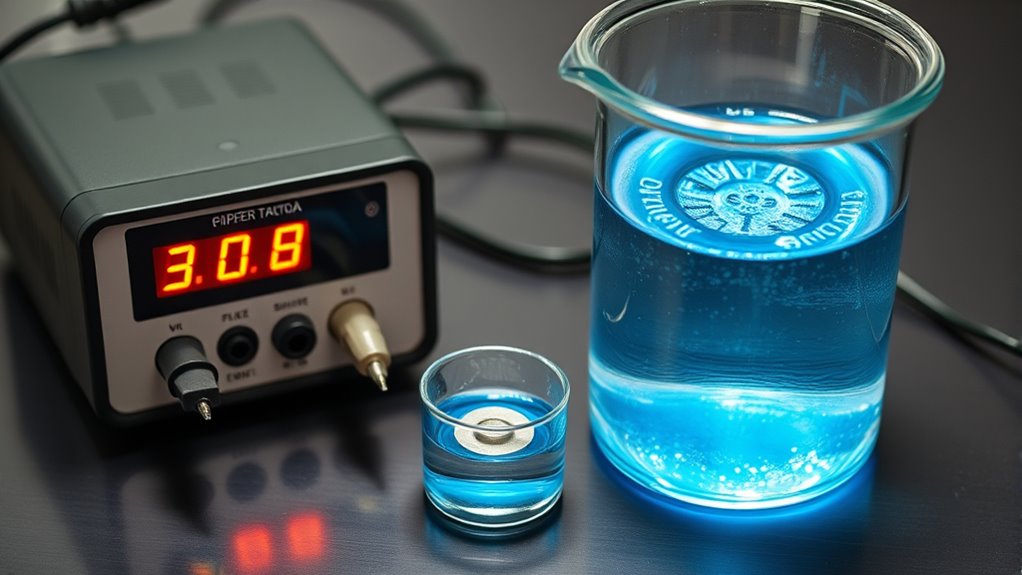
Setting up your first electroplating kit begins with gathering the essential components. You’ll need a DC power supply, or rectifier, to control voltage and current. Choose a container made of plastic, glass, or a tank resistant to electrolyte chemicals for your electroplating bath. Select suitable anodes, which are consumable metal targets matching your desired plated metal, like nickel for nickel plating. Secure your workpiece with conductive hooks or clips, ensuring a stable cathode connection during immersion. Maintain proper spacing between the anode and cathode, roughly 15-30 centimeters, to promote even plating. Remember to include a ventilation system or fume hood to safely manage toxic vapors. Proper electrolyte composition is crucial for achieving consistent and high-quality plating results. Additionally, regularly monitoring the electroplating process can help detect issues early and ensure optimal coating quality. Using appropriate safety equipment is essential to protect yourself from harmful chemicals and vapors during operation. It is also important to ensure proper electrode placement to achieve uniform coatings and prevent uneven deposits. Regularly inspecting your setup and maintaining proper electrolyte levels can further improve plating consistency and safety. Once everything is in place, double-check connections and safety gear to guarantee a safe, effective setup.

Jesverty DC Power Supply Variable, 0-30V 0-10A Adjustable Switching DC Regulated Bench Power Supply with High Precision 4-Digit LED Display, 5V/2A USB Port, Coarse and Fine Adjustment SPS-3010
- 4-Digit LED Display: Shows V, A, W in real-time with high resolution
- Auto CV and CC Mode: Switches automatically between constant voltage and current modes
- Adjustable Voltage and Current: 0-30V and 0-10A with coarse and fine tuning
As an affiliate, we earn on qualifying purchases.
As an affiliate, we earn on qualifying purchases.
Choosing the Right Materials for Electroplating
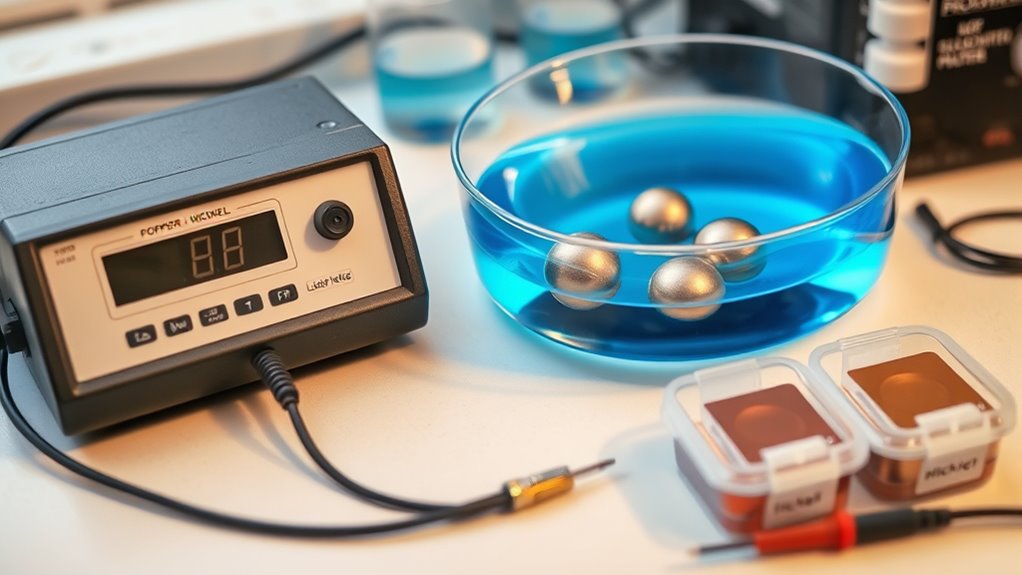
Selecting the appropriate materials for electroplating is essential to achieving the desired quality and performance of your finished product. Choose metals like gold, silver, nickel, copper, chromium, or zinc based on your specific needs. Gold provides excellent conductivity and a luxurious finish, while silver offers high conductivity and antimicrobial benefits. For versatile applications, base metals like copper and brass are common choices. The metal you pick should enhance the substrate’s properties, such as corrosion resistance or electrical conductivity. The best materials for electroplating depend on the industry and application requirements, ensuring optimal results. When selecting materials, consider environmental factors and the compatibility of the metal with your substrate. Proper material choice guarantees durability, aesthetic appeal, and the overall success of your electroplating project. Additionally, understanding the safety standards and regulations for handling and disposing of certain metals is crucial to ensure a safe and compliant process. Being aware of environmental considerations can help prevent pollution and promote sustainable practices in your electroplating endeavors. Incorporating material compatibility testing can further optimize the electroplating process and prevent issues like poor adhesion or uneven coating. Furthermore, selecting materials with appropriate chemical resistance is important to withstand the electroplating environment and any subsequent use conditions.

ALDON Copper (II) Sulfate Solution, 1M, 500mL – The Curated Chemical Collection
- Laboratory Grade Quality: Meets strict scientific standards
- Versatile Applications: Used in chemical reactions and electroplating
- Safety & Storage Instructions: Includes safety guidelines and storage info
As an affiliate, we earn on qualifying purchases.
As an affiliate, we earn on qualifying purchases.
Step-by-Step Guide to Conducting an Electroplating Experiment
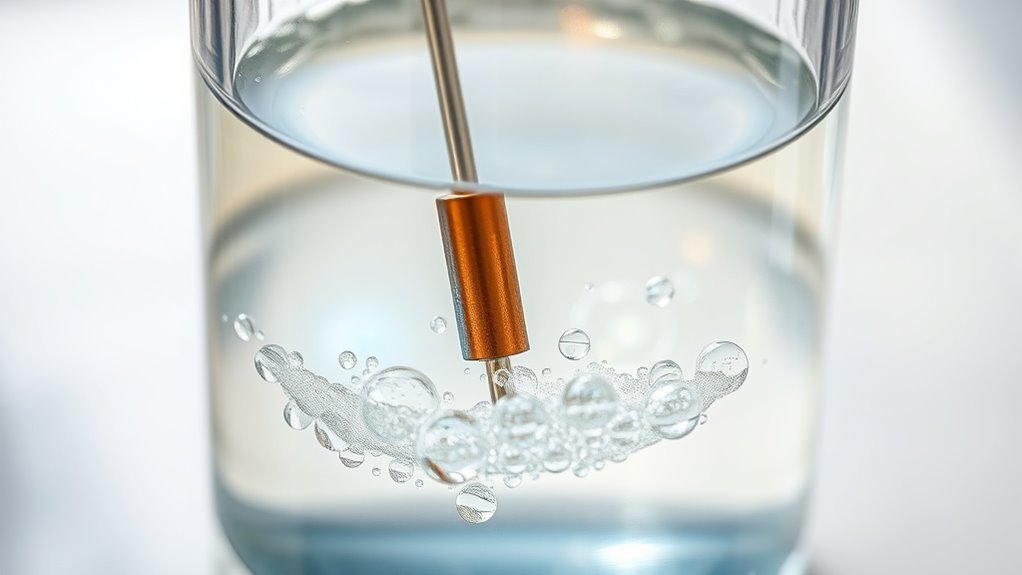
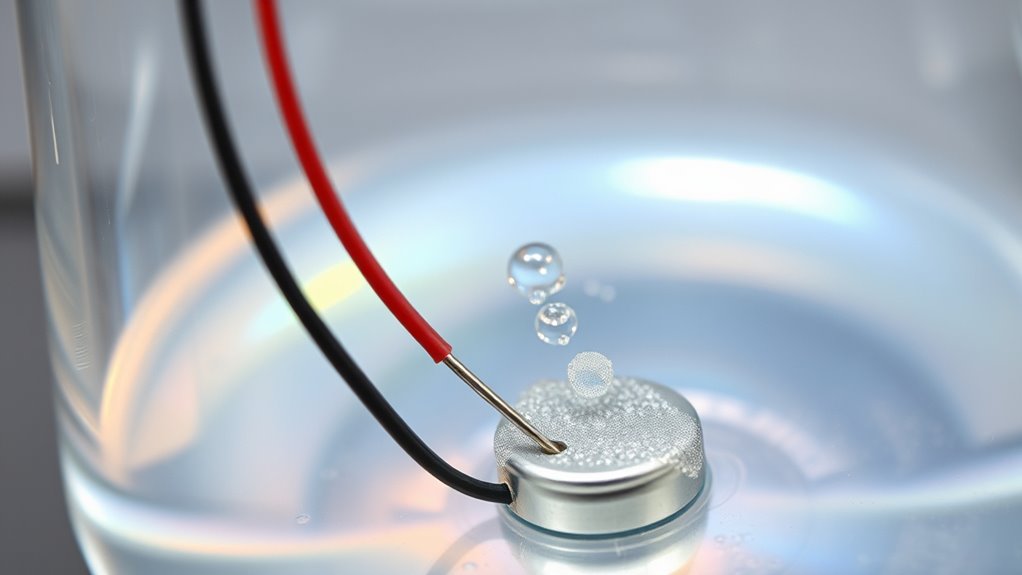
To successfully conduct an electroplating experiment, you need to carefully follow a series of steps that guarantee safety, proper setup, and effective plating. First, wear PPE—gloves, goggles, and a lab apron. Clean your electrodes—polish the brass key (cathode) and copper sheet (anode) with emery paper, then rinse thoroughly. Prepare a 50-mL acetone rinse in a watch glass inside the instructor hood to remove grease. Ensure electrodes are free of contamination before immersion and space them apart to promote uniform plating. Fill the electrolyte with saturated copper sulfate solution, monitoring for soot or particulate buildup. Use a resistor and connect your DC power supply correctly, setting voltage between 3-6V. Fully submerge the electrodes, monitor the reaction, and time the process between 15-30 minutes for ideal results. Additionally, maintaining the proper current density is critical for achieving a smooth and even plating surface, as it influences the quality of the electroplating. It is also important to regularly check the safety procedures to prevent accidents during the experiment.

PATIKIL 25x80mm Copper Anode Sheet, 5 Pack Pure Copper Strip (99.995% Pure) 1mm Thick Plate Electrode Set with Alligator Clips Cables for Electroplating Plating Experiment
- Material: Pure Copper (99.995%)
- Size: 80 x 25mm, 1mm thick
- Pack Contents: 5 Copper Sheets, 2 Wires
As an affiliate, we earn on qualifying purchases.
As an affiliate, we earn on qualifying purchases.
Understanding the Chemical Reactions Involved

Understanding the chemical reactions at play during electroplating helps you grasp how metal layers form on your workpiece. When you connect the circuit, electrons flow from the anode to the cathode. At the anode, metal atoms lose electrons (oxidation), dissolving into the electrolyte as metal ions like Cu²⁺. These ions are carried through the solution to the cathode, where they gain electrons (reduction) and deposit as a metallic layer. The electrolyte contains metal salts, which dissociate into positive ions and negative ions, facilitating ion transfer. The process is driven by the external power source, which provides the energy needed to overcome activation barriers. Factors like current density and electrolyte composition influence how efficiently and smoothly the metal deposits, shaping the quality of your plated layer. Proper control of electrical parameters is essential for achieving a smooth and durable coating. Additionally, maintaining optimal electrolyte conditions ensures consistent and high-quality deposition. A thorough understanding of these chemical reactions enables better control over the electroplating process and improves the final results. Being aware of contaminant effects also helps prevent defects and ensures a cleaner, more reliable coating. Furthermore, monitoring environmental factors such as temperature can significantly impact the consistency of the plating process.
Tips for Improving Electroplating Results

Optimizing electroplating results requires careful control of key parameters that influence deposit quality. Start by adjusting current density within ideal ranges—around 5–7 A/dm²—to control the deposition rate. Keep electroplating time short, about five minutes, to boost throughput without sacrificing thickness standards. Maintain electrolyte concentration at a Baume density of 22 for consistent results. Use an auxiliary cathode width of 3600 µm to reduce non-uniformity, and select mask apertures like CM SOA 548 mm × 548 mm or AM SOA 500 mm × 500 mm for even current distribution. Incorporate simulation tools like COMSOL® and design experiments with RSM or Taguchi methods to identify best conditions. Regularly monitor bath pH, temperature, and agitation to prevent passivation, dendritic growth, and uneven deposits. Additionally, paint sprayer zone is essential for achieving optimal electroplating quality.
Frequently Asked Questions
How Do I Safely Dispose of Used Electrolyte Solutions?
You need to carefully dispose of used electrolyte solutions to stay safe and comply with regulations. First, neutralize the solution by adding baking soda if it’s acidic or citric acid if it’s alkaline, in a well-ventilated area with PPE. Once neutralized and pH-balanced between 6-9, you can either dilute it for sewer discharge if permitted or contact a licensed hazardous waste contractor for proper disposal. Always follow local laws and safety guidelines.
Can Electroplating Be Done on Non-Metal Objects?
Imagine a plastic toy glowing with a shiny metallic finish—that’s electroplating a non-metal object. Yes, you can do it! You’ll need to prepare the surface with a conductive coating or electroless plating, which makes non-conductive materials like plastic or wood receptive to metal layers. Proper surface prep guarantees good adhesion, giving your object a sleek, durable finish. It’s challenging but entirely possible with the right techniques.
What Are Common Mistakes That Ruin Electroplating Experiments?
When you try electroplating, common mistakes can ruin your results. You might skip proper surface cleaning, leading to poor adhesion or uneven coating. Using incorrect current settings or uneven distribution causes rough or flaky deposits. Contaminated solutions or inconsistent agitation can create pits or dull finishes. Failing to control temperature, pH, or timing also impacts the uniformity and quality of the plating. Pay attention to these details for successful experiments.
How Do I Prevent Uneven Metal Deposition During Plating?
Did you know uneven electroplating can cause defects that compromise your project’s quality? To prevent this, you should focus on maintaining even current distribution, which is responsible for up to 80% of plating issues. Make sure to optimize part placement, control bath temperature, and stir the solution regularly. Clean surfaces thoroughly and adjust current density to guarantee a smooth, uniform metallic layer every time.
Is It Possible to Electroplate Multiple Metals in One Process?
You ask if you can electroplate multiple metals in one process. While some specialized baths allow simultaneous deposition of alloys like brass, plating distinct metals individually is challenging due to differing reduction potentials. Usually, you need separate baths for each metal, controlling voltage, chemistry, and timing carefully. Multi-metal layering is common in industry, but doing it all in one step requires advanced equipment and precise control to avoid uneven deposits and contamination.
Conclusion
Now that you know the basics, try experimenting with different metals or objects. For example, you could electroplate a small jewelry piece to give it a shiny, durable finish. Imagine transforming a simple key into a beautiful, corrosion-resistant accessory—it’s both fun and rewarding! Keep practicing, follow safety tips, and enjoy the creative process. With patience, you’ll master electroplating and create stunning, professional-looking results right at home.