
To build a DIY spectroscope, gather materials like cardboard, diffraction gratings (from DVDs or holographic sheets), a small flashlight, and a smartphone or camera. Cut and assemble a tube with a slit, attach the diffraction element at an angle, and guarantee the setup is light-proof. Secure your camera or phone for capturing spectra, then calibrate using known light sources like LEDs or mercury lamps. Keep practicing, and you’ll discover the secrets of light spectra as you continue experimenting.
Key Takeaways
- Gather materials like cardboard, diffraction grating, and a smartphone, then cut and assemble a tube with an entry slit and diffraction element.
- Mount the diffraction grating at a 30-45° angle inside the tube, securing it to align with the slit for proper spectral dispersion.
- Create a light-tight setup by sealing gaps with tape and adding end caps, ensuring accurate spectral capture.
- Attach your camera or smartphone so its sensor aligns with the slit, and verify focus and alignment with test shots.
- Calibrate the spectroscope using known light sources like mercury lamps or LEDs to ensure accurate spectral measurements.

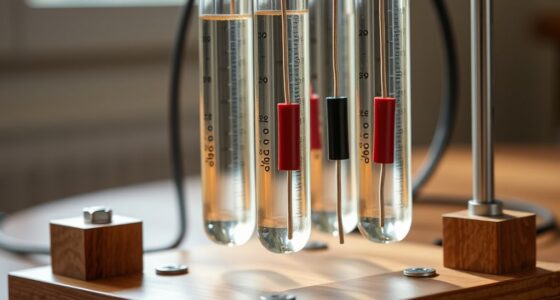
3B Scientific U19500 Diffraction Grating Spectroscope 25mm Diameter x 115mm Length
High-quality optical system with centered visible spectrum, which is linear with respect to the wavelength
As an affiliate, we earn on qualifying purchases.
As an affiliate, we earn on qualifying purchases.
Gathering Materials and Tools
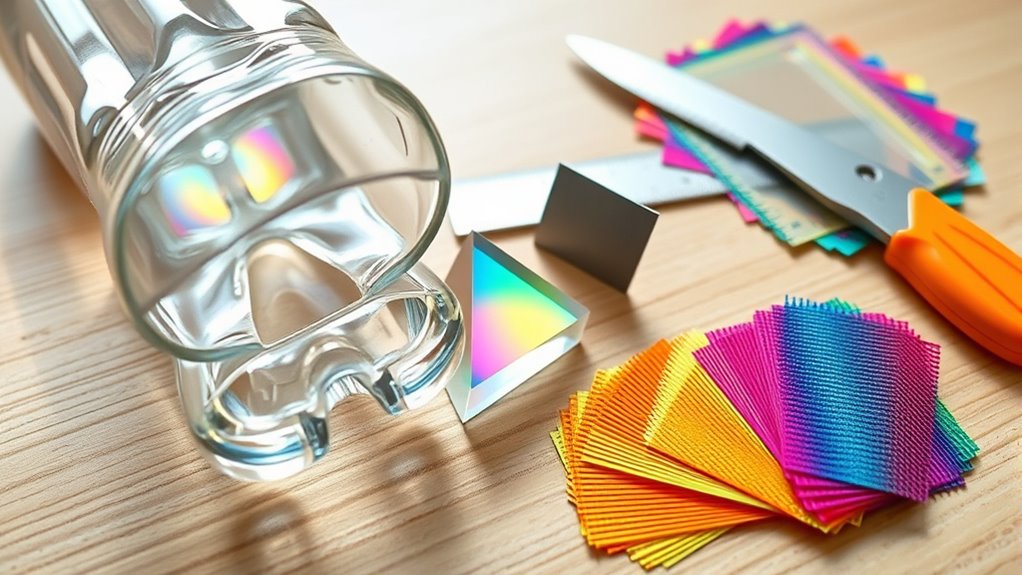
To build your DIY spectroscope, start by gathering the essential materials and tools. You’ll need cardboard, which serves as your main housing, and black chart paper to line the interior and absorb stray light. Collect a diffraction grating, such as from an old DVD or holographic sheet, to split light into spectral colors. A webcam is necessary for detecting and recording spectra; you can repurpose an old device. For precise cuts, grab scissors or a razor knife, and use glue or tape to secure components. A ruler helps with accurate placement, while a small flashlight can assist in calibration. A marker is useful for marking positions. Optional tools include graph paper for analysis, aluminum foil tape for reinforcement, and household items like soda cans for slits, all kept within a low-cost budget. Incorporating spectroscopy techniques can help you understand and analyze the spectral data more effectively, especially by adjusting the setup to optimize the spectral resolution. Additionally, paying attention to light dispersion ensures you achieve clearer spectral separation during your observations. Including a diffraction grating with finer lines can further enhance your spectral detail. Remember that experimenting with different configurations can also improve your understanding of how spectral data correlates with various light sources.

MEELYHOME Handheld Spectroscope Light Emission Spectroscopy Spectrum Hobby Kit
The amazing equipment that can analyze light spectrum from any light source.
As an affiliate, we earn on qualifying purchases.
As an affiliate, we earn on qualifying purchases.
Preparing the Spectroscope Template

Preparing the spectroscope template is a crucial step that simplifies building your device. You can find templates online designed for printing and cutting, making the process easier. These templates provide clear guides for cutting the cardboard or paper, guaranteeing accurate dimensions for your spectroscope’s body. You can also customize templates to fit different designs or preferences. Once printed, trace the template outlines onto your chosen sturdy material, like thick paper or cardboard. Using scissors or a craft knife, carefully cut along the lines, making sure edges are smooth for a better fit. Proper preparation of the template ensures precise assembly later on and helps streamline the entire building process, so take your time to get it right before moving on to the next steps. Additionally, understanding the industrial manufacturing process can inspire more precise and durable designs for your DIY spectroscope. Considering material selection can further improve the longevity and performance of your device. Incorporating quality control principles from manufacturing can also help ensure your spectroscope functions accurately and reliably. Moreover, employing data-driven strategies when designing your template can lead to improvements based on previous setups and results.

DIY Smartphone Spectrometer – Full Pack – Grating Transmission –
DIY Smartphone Spectrometer – Full Pack – Grating Transmission –
As an affiliate, we earn on qualifying purchases.
As an affiliate, we earn on qualifying purchases.
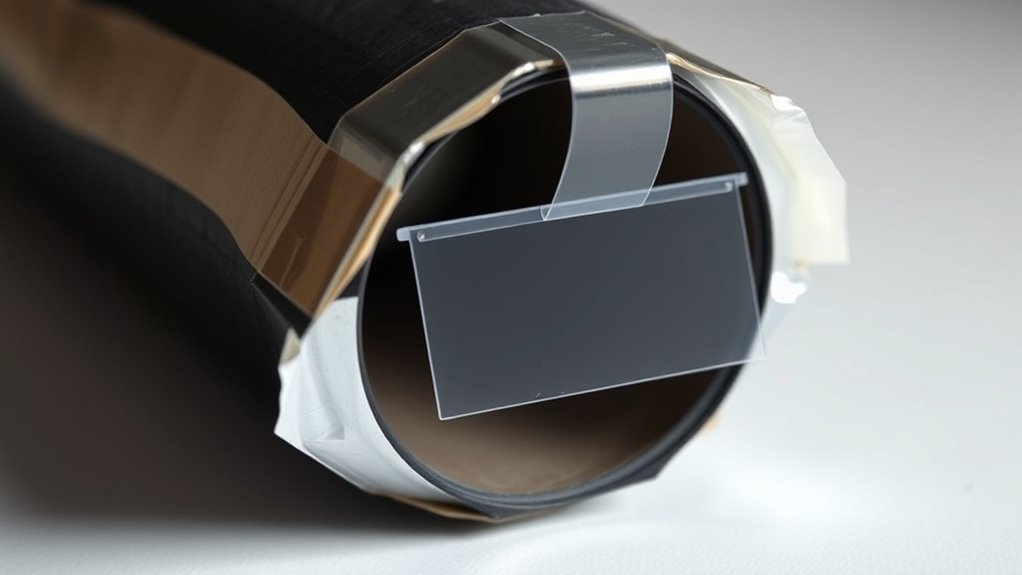
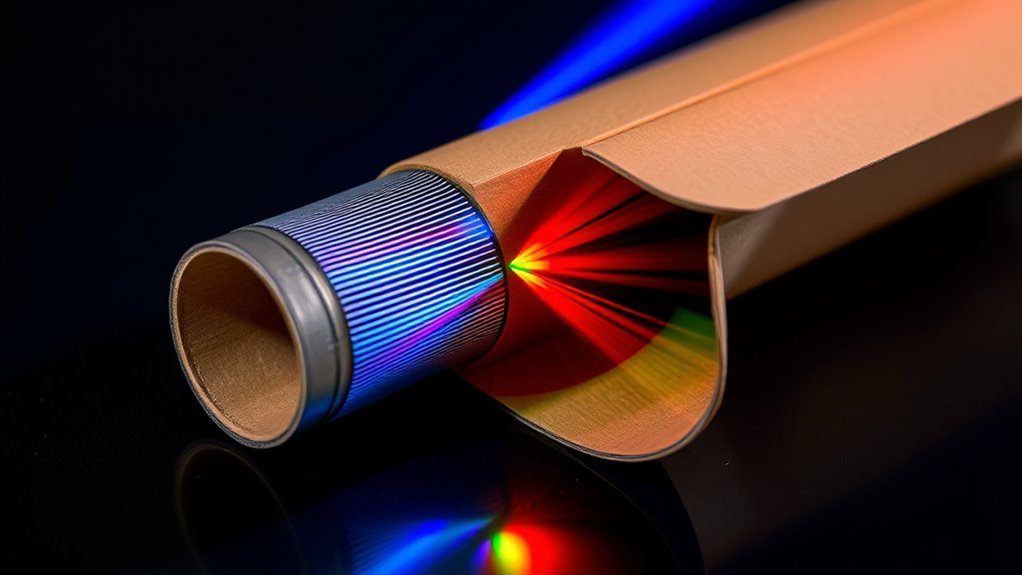
Attaching the Diffraction Element
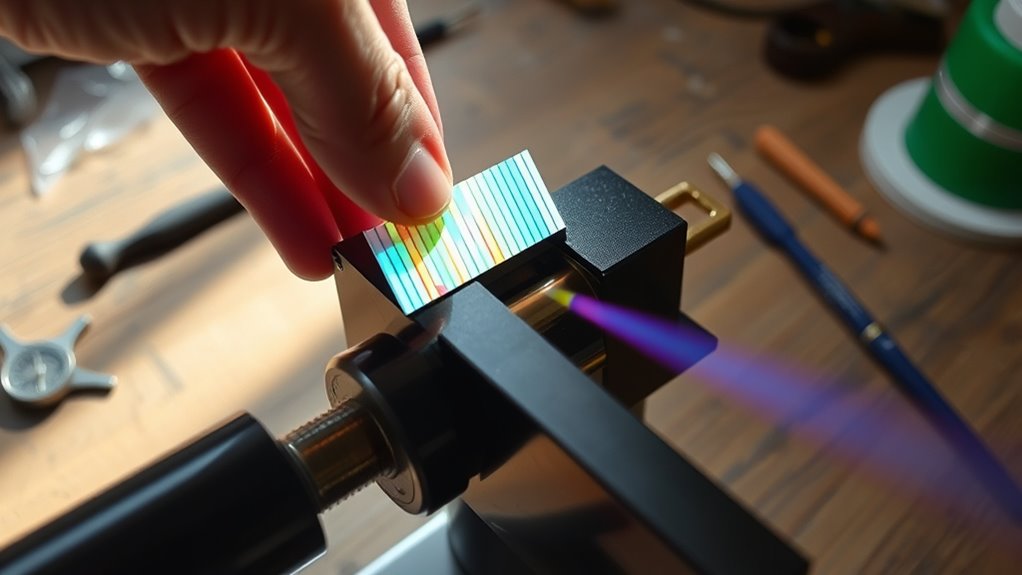
Attaching the diffraction element correctly is essential for guaranteeing accurate spectral separation in your spectroscope. First, choose the appropriate diffraction grating—either a DVD-R, holographic, or pre-purchased grating—based on your needs. Ensure the groove lines run parallel to the light entry slit to get proper wavelength dispersion. Mount the grating at a 30-45° angle relative to the incident light, securing it 5-10cm from the slit with folded cardboard flaps and glue. Use black tape to line the mounting surface, reducing stray reflections. Verify alignment by temporarily fixing the grating with tape before permanently gluing it in place. Make sure the grating width exceeds the slit by at least 20%, and keep the light path at least 15cm long for ideal collimation. Incorporate a spectral resolution check to ensure precise measurement of wavelengths. Additionally, proper alignment of the diffraction grating is crucial to prevent distortions in the spectra and ensure accurate readings. The use of advanced optical components has further improved the precision of spectral analysis, emphasizing the importance of careful setup. Remember that AI discoveries have advanced the development of more precise spectral analysis tools, making careful setup even more important.
spectroscope building materials
As an affiliate, we earn on qualifying purchases.
As an affiliate, we earn on qualifying purchases.
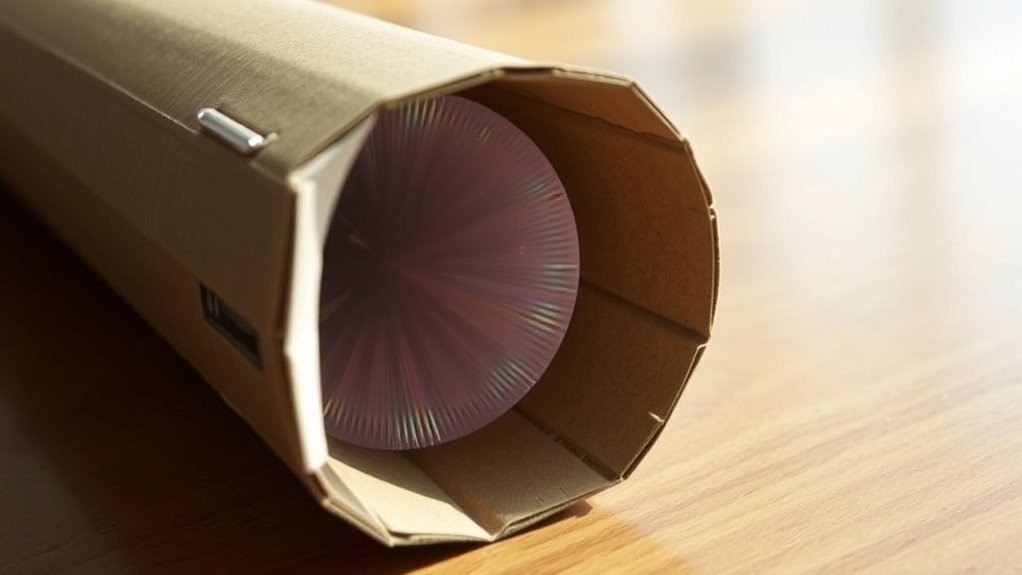
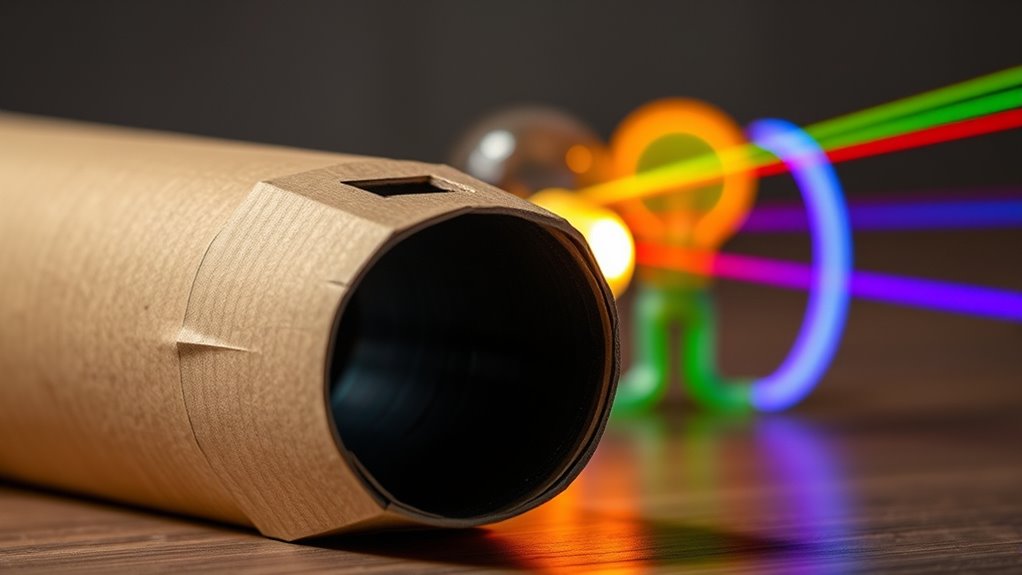
Constructing the Viewing Tube
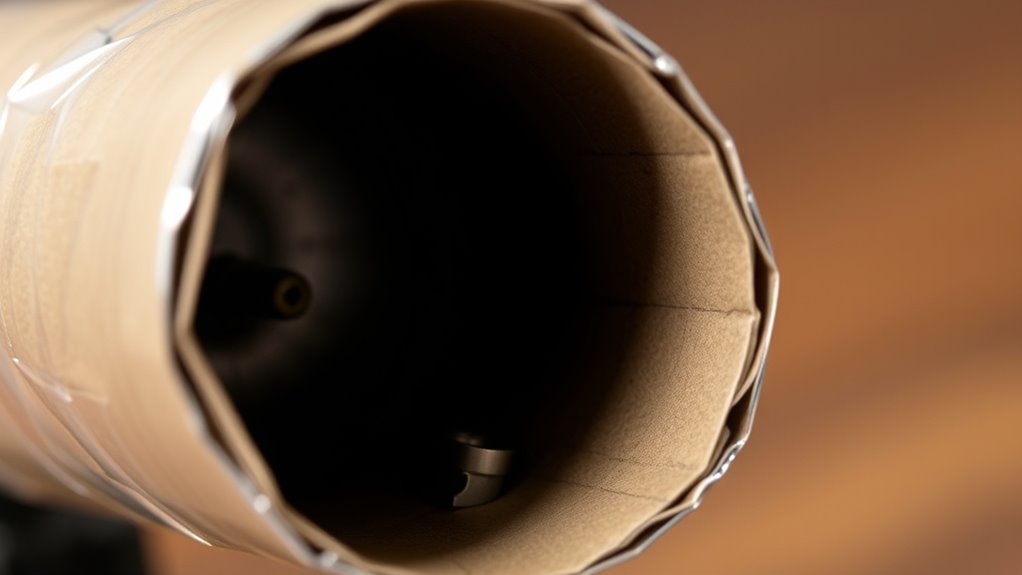
Constructing the viewing tube involves selecting simple materials and shaping them to create a dark, light-proof environment for observing spectra. Start with a cardboard tube, like from toilet paper or paper towels, and cut it to the desired length. Cut a small viewing hole on one side, ensuring it’s positioned for comfortable observation. Create an angled cut on the opposite end for the diffraction element, if used. To block light, line the interior with black construction paper and secure it with tape or black masking tape. For added darkness, you can paint the inside with non-reflective paint or charcoal. Make sure all edges are covered to prevent light leaks. Attaching end caps that fit snugly over the tube, taping them securely for stability, can help maintain a light-tight environment. Proper filtration of light entering the tube can improve the clarity of observations. Additionally, ensuring the light-proof environment is maintained is essential for clear spectral observations. Using light-tight seals around the edges can further prevent unwanted light intrusion and enhance observation quality. Incorporating cost-effective materials can help keep the project affordable while maintaining effectiveness.
Sealing the Assembly to Block Light Leaks
To effectively block light leaks in your spectroscope, you need to carefully seal all gaps and joints using suitable materials. Start by applying electrical or non-transparent tape over any visible gaps or seams. Foam tape is useful for securing joints and preventing light entry, while aluminum foil tape can cover surfaces to block stray light. Reinforce weak spots with additional layers of cardboard or masking tape, especially around joins and edges. Use foam sealants for small openings or gaps around components, ensuring a snug fit. Regularly inspect your assembly by shining a light through it; look for any leaks and reseal as needed. Proper sealing guarantees that external light doesn’t interfere with your spectrum, ensuring accurate and clear results. Additionally, choosing light-absorbing materials can further improve the effectiveness of your sealing process. Incorporating cost management strategies can help optimize the use of sealing materials and prevent unnecessary expenses.
Mounting Your Smartphone for Digital Spectrum Capture
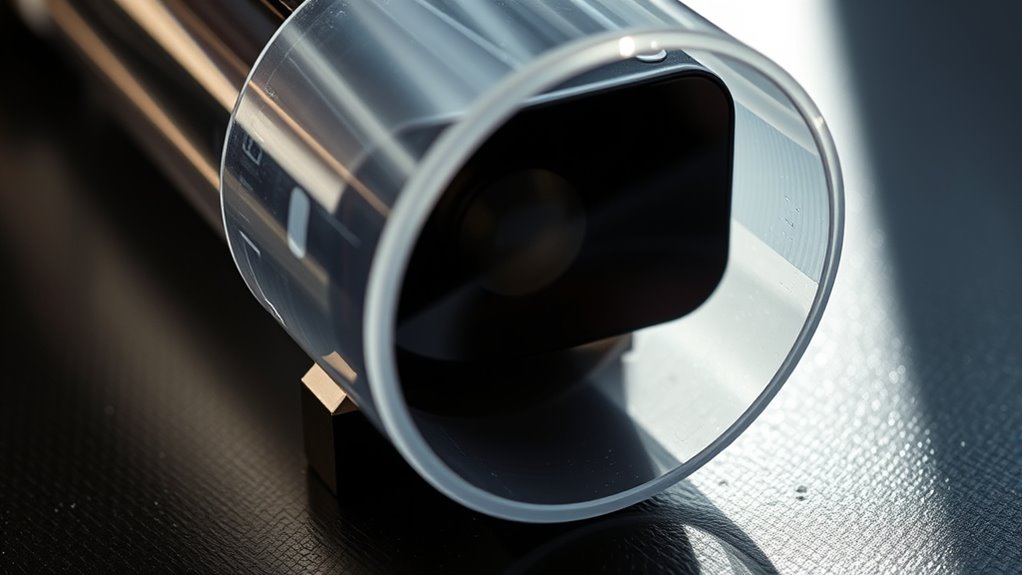
Mounting your smartphone securely is essential for obtaining clear and accurate spectral images. You can use tape-based methods for quick setup by placing the diffraction grating directly on your camera lens and securing it with sticky tape. For more precise alignment, consider 3D-printed modular designs that hold components without adhesives, allowing repeatable experiments. An adhesive-free assembly with slit-based insertion helps prevent grating damage during installation. These mounts are compatible with various camera types, such as the primary, macro, or webcam lenses. Quick-release mechanisms in 3D designs enable fast attachment and removal without permanent modifications. Proper alignment involves positioning the aperture with the camera sensor center, keeping the diffraction grating within 5-10mm of the focusing lens, and verifying with test shots or laser alignment checks.
Calibrating Your Spectroscope With Known Light Sources
Once you’ve securely mounted your smartphone and captured spectral data, calibrating your spectroscope guarantees the measurements are accurate. Use known light sources like low-pressure mercury lamps or LEDs with specific wavelengths—such as 254 nm, 436 nm, or 546 nm—to establish reference points. Mercury lamps provide multiple emission lines, while LEDs emit narrow, stable wavelengths—red at 635 nm, green at 555-565 nm, and blue at 470 nm. External calibration sources and spectral standards help verify your readings. Many spectrometers utilize software to automate calibration, matching observed spectra with known references. Ensure your slit width and environmental conditions are stable during calibration. Regular recalibration with quality sources keeps your measurements precise, accounting for factors like temperature changes and equipment wear.
Analyzing Different Light Sources and Spectra
Different light sources produce distinct spectral patterns that are essential to understand when analyzing spectra with your spectroscope. Thermal sources like tungsten-halogen lamps emit a continuous spectrum covering 350-2500 nm, ideal for studying broad visible ranges. Gas-discharge lamps, such as mercury or argon, produce sharp emission lines used for calibration. LEDs emit narrow wavelengths—such as 405 nm or 630 nm—perfect for targeting specific colors or features. UV sources like deuterium lamps excel in the 190-400 nm range but are often paired with other lamps for full coverage. Xenon arc lamps provide high-intensity UV-VIS light but are less common in DIY setups. Recognizing these spectral patterns helps you interpret your measurements accurately and choose the right source for your analysis goals.
Tips for Improving Spectroscope Performance

Improving your spectroscope’s performance starts with focusing on the design and materials you choose. Use high-quality lenses, mirrors, and gratings to boost spectral resolution and minimize distortion. Select materials that limit absorption and maximize reflectivity, ensuring better light handling. Precise alignment of all components maintains optical integrity and reduces signal loss, while a sturdy frame prevents vibrations that can compromise measurements. Operating in a controlled environment, like a vacuum or purged chamber, minimizes interference from ambient conditions. Choose diffraction gratings with high line density for sharper spectral detail, and use sensitive detectors to capture a wider wavelength range. Regularly calibrate with known light sources, and keep your setup mechanically stable. These steps will considerably enhance your spectroscope’s accuracy and reliability.
Frequently Asked Questions
Can I Use Recycled or Household Materials to Build the Spectroscope?
Yes, you can definitely use recycled or household materials to build your spectroscope. Common items like toilet paper tubes or PVC pipes serve as the main structure, while old CDs or DVDs work as diffraction gratings after removing their reflective layers. You’ll also need materials like index cards, tape, and scissors, which are all found around your house. These DIY options make building a spectroscope affordable, fun, and environmentally friendly.
What Safety Precautions Should I Follow During Construction?
Did you know that over 60% of injuries from DIY projects occur from improper tool handling? During construction, you should always wear safety gear, like gloves and goggles, to protect your eyes and hands. Use adult supervision when handling sharp tools, cut away from your body, and secure materials firmly. Double-check your work for sharp edges or loose parts, and clean up debris to prevent accidents. Safety first guarantees your project stays fun and injury-free.
How Accurate Will My Homemade Spectroscope Be?
Your homemade spectroscope can be quite accurate for educational and amateur research, often reaching wavelength precision around 0.35 nm with proper calibration. To verify accuracy, align components carefully, use high-quality diffraction gratings, and calibrate with known spectral lines. Capture images in RAW format and employ calibration software. Keep in mind, environmental factors and component quality may limit precision, but with good practices, you’ll get reliable spectral measurements.
Is It Possible to Analyze Infrared or Ultraviolet Light With This Setup?
Ever wonder if your DIY spectroscope can see beyond visible light? In short, it can’t directly analyze infrared or ultraviolet light with its basic setup. These wavelengths need specialized detectors and materials not included in simple kits. But don’t be discouraged! You can modify your device with external IR or UV sensors, or use advanced equipment, to explore those hidden parts of the spectrum. Isn’t discovering more exciting than ever?
How Can I Modify the Design for Better Spectral Resolution?
To improve spectral resolution, you should use a high-quality diffraction grating with more lines per millimeter, like 1000 lines/mm, for better dispersion. Narrow the slit width to around 25 microns, balancing resolution and light intensity. Use a high-quality lens with minimal aberrations, and guarantee your camera has a high-resolution sensor. Optimize the light path for straightness, and add a calibrated spectral scale to enhance accuracy.
Conclusion
Now that you’ve built your own spectroscope, you’ve uncovered the universe’s hidden colors and secrets. With each spectrum you observe, you connect more deeply with the wonder of light and discovery. Remember, this simple device opens doors to endless exploration — a reminder that science is within your reach. So, keep looking up, keep experimenting, and let your curiosity illuminate the extraordinary world waiting just beyond the visible. Your journey into the spectrum has only just begun.