

This guide provides clear instructions for educators or parents on how to select, prepare, and facilitate educational science kits for students. It covers setup, safety, and activity execution to ensure a productive and engaging learning experience for students of various ages. The instructions assume a basic familiarity with science concepts and some experience in teaching or supervising children in a learning environment.

EUDAX School Physics Labs Basic Electricity Discovery Circuit and Magnetism Experiment Kits for High School Students
- ✔ Items for Electricity: 56
- ✔ Items for Magnetism: 21
- ✔ Repair Tools: 2 pcs
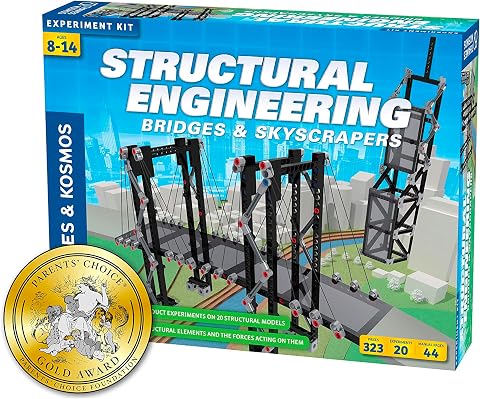
Thames & Kosmos Structural Engineering: Bridges & Skyscrapers Science & Engineering Kit
- ✔ Number of models: 20
- ✔ Building pieces: 285+
- ✔ Manual pages: 36
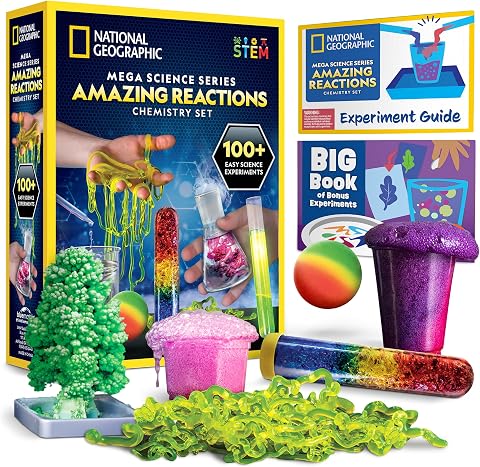
National Geographic Amazing Chemistry Set – 100+ Science Experiments for Kids
- ✔ Number of Experiments: 100+
- ✔ Bonus Experiments: 85
- ✔ Included Materials: test tubes, beakers, pipettes
Difficulty: Intermediate | Time: 30-60 minutes
What You’ll Need
Tools & Materials:
- Science kit containing materials and instructions
- Protective gear (gloves, goggles)
- Cleaning supplies
- Notebook or worksheet for recording observations
Knowledge:
- Basic understanding of scientific methods
- Ability to supervise children safely
- Familiarity with safety protocols in science experiments
Check the kit contents before starting to ensure all components are present. Read the instruction manual included in the kit thoroughly. Prepare a clean, well-ventilated workspace free of distractions.
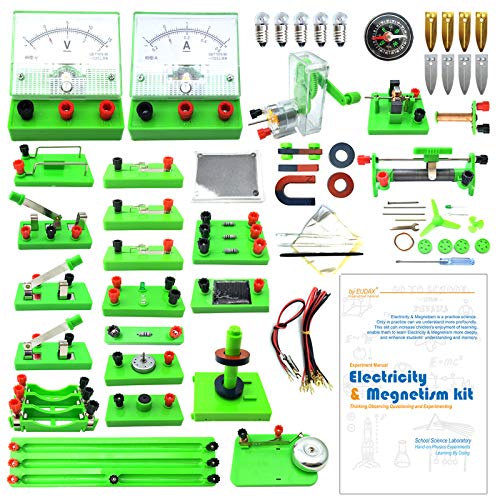
EUDAX School Physics Labs Basic Electricity Discovery Circuit and Magnetism Experiment Kits for High School Students Electromagnetism Elementary Electronics
Learn basic Electricity and Magnetism experiments through full-color manuals, understand the basic principles, and help Students learn, think...
As an affiliate, we earn on qualifying purchases.
EUDAX School Physics Labs Basic Electricity Discovery Circuit and Magnetism Experiment Kits for High School Students
This kit stands out for its comprehensive approach to exploring electricity and magnetism through multiple experiments, making it ideal for high school students pursuing STEM. Compared with the other options, it offers in-depth activities, including 56 items for electricity and 21 for magnetism, supported by a detailed color manual. However, the setup can be complex for younger learners, and batteries are not included, which adds an extra step. This makes it less ideal for quick or casual experiments but perfect for dedicated students seeking a thorough physics foundation.
Pros:
- Comprehensive set covering both electricity and magnetism
- Includes detailed, easy-to-follow manual
- Suitable for STEM-focused high school education
Cons:
- Batteries are not included, requiring additional purchase
- Setup may be complex for less experienced students
Best for: High school students interested in physics and hands-on experimentation
Not ideal for: Younger children or beginners who need simpler, less detailed kits
Bottom line: A perfect choice for high school students looking for an in-depth physics experimentation kit, despite some setup complexity.
“A perfect choice for high school students looking for an in-depth physics experimentation kit, despite some setup complexity.”

Thames & Kosmos | Structural Engineering: Bridges & Skyscrapers | Science & Engineering Kit | Build 20 Models | Learn about Force, Load, Compression, Tension | Parents' Choice Gold Award Winner, Blue
Build 20 different models that each teach about force, load, compression, tension and more
As an affiliate, we earn on qualifying purchases.
Thames & Kosmos Structural Engineering: Bridges & Skyscrapers Science & Engineering Kit
This engineering kit excels at teaching students about force, load, and structural principles through the construction of 20 different models. With over 285 building pieces and a 36-page illustrated manual, it offers extensive hands-on activity for students with intermediate skills. Compared to the chemistry and physics kits, it requires more patience and time, making it less suitable for quick experiments or younger children new to assembly tasks. Its focus on engineering makes it ideal for students interested in architecture and structural design, but beginners might find the setup daunting.
Pros:
- Provides practical understanding of engineering principles
- Includes a large variety of interchangeable parts
- Comprehensive manual guides construction
Cons:
- Assembly can be time-consuming and challenging
- Skill level may be too high for absolute beginners
Best for: Students with some building experience or interest in engineering concepts
Not ideal for: Beginners or younger children who need simpler, pre-assembled kits
Bottom line: A robust engineering kit perfect for students ready to tackle complex building projects and learn about structural forces.
“A robust engineering kit perfect for students ready to tackle complex building projects and learn about structural forces.”

National Geographic Amazing Chemistry Set - Chemistry Kit with 100+ Science Experiments Including Crystal Growing and Reactions, Science Kit for Kids, STEM Gift for Boys and Girls (Amazon Exclusive)
OVER 100 EXCITING EXPERIMENTS - The science experiments in this kit let kids explore the wonders of hands-on...
As an affiliate, we earn on qualifying purchases.
National Geographic Amazing Chemistry Set – 100+ Science Experiments for Kids
This chemistry set offers a wide array of over 100 experiments, including crystal growing, color-changing solutions, and glowing test tubes, making it ideal for younger children or beginners. It emphasizes fun and creativity, with all necessary materials included, plus bonus experiments. Compared to physics and engineering kits, it is less complex and more accessible, but it may require adult supervision for safety and understanding. Its focus on engaging experiments makes it a great starter kit for inspiring curiosity, though older or more advanced students might find it too simplistic.
Pros:
- Huge variety of experiments to keep children engaged
- Includes all needed materials and bonus experiments
- Encourages creativity and scientific curiosity
Cons:
- May require adult supervision for safety
- Some experiments need household items not included
Best for: Younger children or beginners new to STEM experiments
Not ideal for: Older students or those seeking more technical or in-depth experiments
Bottom line: A fun, engaging chemistry set perfect for sparking interest in STEM for young learners, with some limitations for more advanced students.
“A fun, engaging chemistry set perfect for sparking interest in STEM for young learners, with some limitations for more advanced students.”
As an Amazon Associate we earn from qualifying purchases.
Before You Start
Ensure all safety equipment is available and in good condition. Confirm the age appropriateness of the kit for the students involved. Review safety guidelines with students before beginning activities. Prepare any additional materials needed for specific experiments.
Step-by-Step Instructions
Step 1: Select an appropriate science kit
Review the available kits and choose one suitable for the students’ age, skill level, and curriculum goals. Check the kit contents and instructions for compatibility with your group.
Tip:Opt for kits with clear instructions and comprehensive safety warnings. For beginners, start with simpler experiments that have fewer safety risks.
Check: The chosen kit includes all necessary components and materials, and the instructions are appropriate for your students’ age and skill level.
Step 2: Prepare the workspace
Set up a clean, flat surface in a well-lit area. Cover the workspace with protective sheets or newspaper to contain messes. Gather all safety equipment and tools needed.
Tip:Ensure ventilation if experiments involve fumes or chemicals. Keep water, first aid kit, and emergency contacts nearby.
Check: The workspace is organized, safe, and ready for experiments, with all tools and safety gear accessible.
Step 3: Explain safety rules and procedures
Discuss safety protocols with students, including handling chemicals, using protective gear, and what to do in case of spills or accidents. Demonstrate proper safety equipment use.
Tip:Emphasize the importance of following instructions and never bypass safety steps.
Check: Students understand and can demonstrate correct safety procedures before starting experiments.
Step 4: Set up the experiment according to the instructions
Follow the kit instructions step-by-step to prepare the experiment. Measure, mix, or assemble components as directed.
Tip:Read each step thoroughly before executing to prevent mistakes. Double-check measurements and connections.
Check: The experiment setup matches the diagram or instructions provided in the kit, with all components correctly assembled.
Step 5: Guide students through the experiment
Supervise students as they perform the experiment, providing assistance and ensuring safety. Encourage accurate measurements and recording observations.
Tip:Ask guiding questions to promote understanding and critical thinking during the activity.
Check: Students complete the experiment following instructions and record observations accurately.
Step 6: Review results and discuss findings
Help students analyze their results, compare with expected outcomes, and discuss scientific principles involved.
Tip:Use visual aids or diagrams to clarify concepts if needed.
Check: Students can explain their observations and relate them to scientific concepts covered in the activity.
Common Mistakes to Avoid
- Not reading the entire instruction manual before starting. — Read all instructions carefully beforehand to understand the process and safety precautions.
- Ignoring safety protocols or skipping protective gear. — Always wear safety equipment and follow safety rules strictly, especially when handling chemicals or fragile materials.
- Overloading or misassembling components. — Follow assembly instructions precisely and double-check connections or measurements.
- Rushing through steps without supervision. — Guide students actively and ensure each step is completed correctly before moving on.
Troubleshooting
Problem: Experiment does not produce expected results.
Solution: Review each step for accuracy, check measurements, and verify the condition of materials and tools.
Problem: Chemical spills or accidents occur.
Solution: Immediately follow safety procedures: contain the spill, wash affected areas, and report incidents. Review safety rules with students.
Problem: Materials or parts are missing from the kit.
Solution: Contact the supplier or manufacturer for replacements. Use alternative materials if available and safe.
Problem: Students are unsure about the procedure.
Solution: Revisit instructions and demonstrate steps again. Provide additional guidance or visual aids.
What Success Looks Like
All experiments are completed safely, with students understanding the scientific concepts demonstrated. Observations are recorded clearly, and results align with expected outcomes. Students can explain the experiment process and findings accurately.
Next Steps
Clean up the workspace, properly store or dispose of materials, and review safety procedures with students. Plan additional experiments or activities building on this experience. Seek feedback to improve future sessions and consider preparing for more complex kits as confidence and skills grow.
Frequently Asked Questions
How do I choose the right science kit for my students?
Select kits based on the students’ age, safety considerations, curriculum relevance, and complexity. Read reviews and check the contents and instructions for clarity.
What safety precautions are essential when using science kits?
Always wear protective gear, supervise closely, handle chemicals carefully, and follow all instructions. Keep emergency supplies nearby and ensure proper disposal of materials.
How can I adapt experiments for different age groups?
Modify the complexity of steps, provide additional guidance, and use simplified explanations or visuals for younger students. For older students, encourage independent investigation.
What should I do if a part of the kit is missing or damaged?
Contact the supplier or manufacturer for replacements. Do not force assembly or use damaged parts. Seek alternative materials if necessary and safe.